In this post, we will learn to connect the MongoDB Atlas cluster using a shell command from our local machine.
To connect a cluster we must have:
- A cluster is created in Atlas. If you haven’t created it already you can visit my previous post Create Cluster In MongoDB Atlas and
- We must have a MongoDB shell installed on our computer. If you haven’t installed a MongoDB shell on your computer then you can visit The Mongo Shell and follow the steps given there.
Table of Contents
Verify MongoDB Shell Version
Open your Terminal or Command Prompt if you are using a Windows machine and type:
mongo --versionIf MongoDB shell is already installed on your computer you may see output like:
MongoDB shell version v5.0.4
Build Info: {
    "version": "5.0.4",
    "gitVersion": "62a84ede3cc9a334e8bc82160714df71e7d3a29e",
    "modules": [],
    "allocator": "tcmalloc",
    "environment": {
        "distmod": "windows",
        "distarch": "x86_64",
        "target_arch": "x86_64"
    }
}
It is confirmed that the MongoDB Shell is installed on our machine.
Hence, let us start connecting to Atlas Cluster from our computer using MongoDB Shell.
Connect cluster using MongoDB Shell
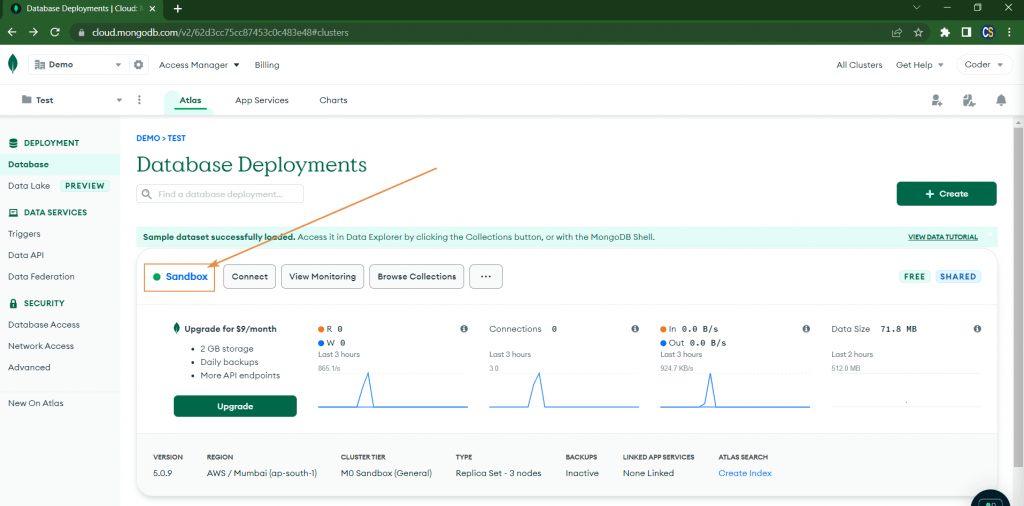
- Go to your Database Deployments and select your cluster. In our case Sandbox is the cluster where we are trying to connect.
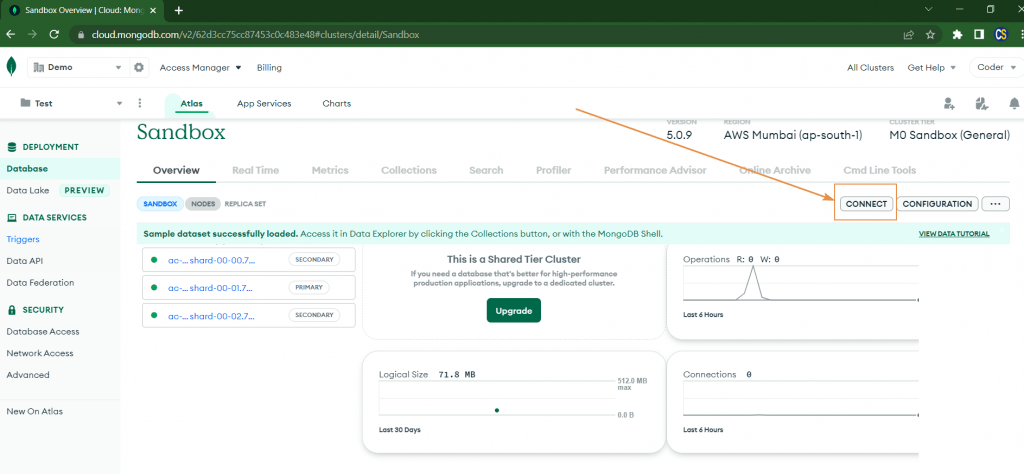
- Click Connect button on the right side. (You can directly click connect from step 1 as well. Both options are the same.)
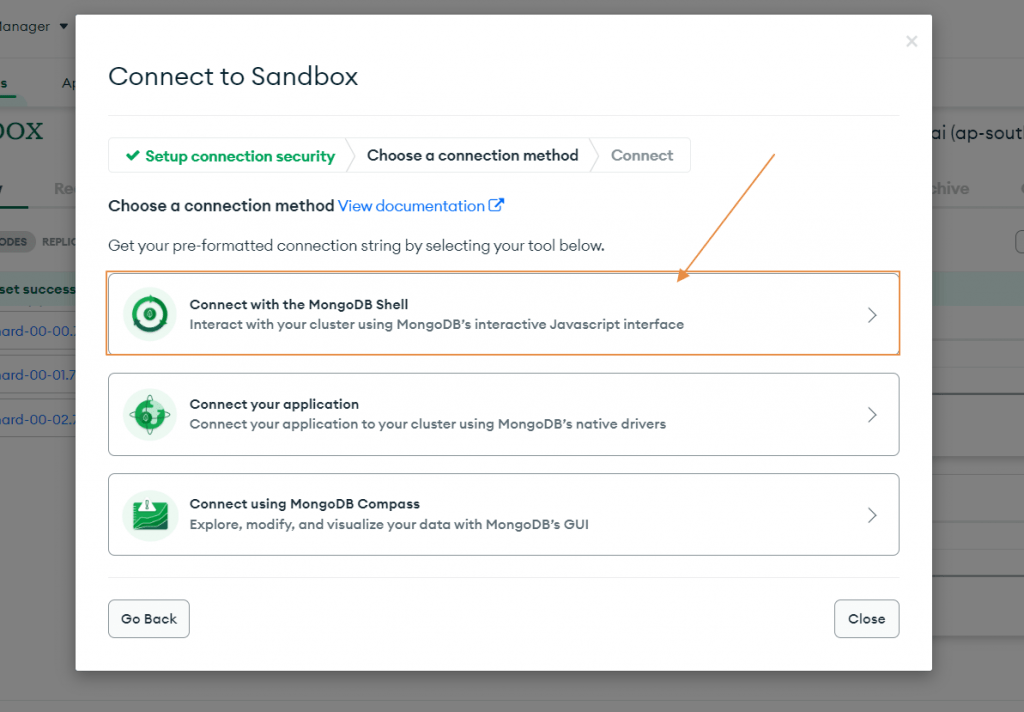
- In the new window, we can see many options to connect. In this tutorial, we are trying to connect from MongoDB Shell. Hence, click on this.
- After clicking Connect with the MongoDB Shell it asks us to download the Mongosh. Since we have already installed MongoDB Shell which is the Prerequisite we don’t have to download and install it. If you haven’t already then you may download it from here. The only difference will be the command. You will see this in the next step. In the following screen, copy the connection string by clicking on the copy icon as shown. See the image below to understand it more clearly.
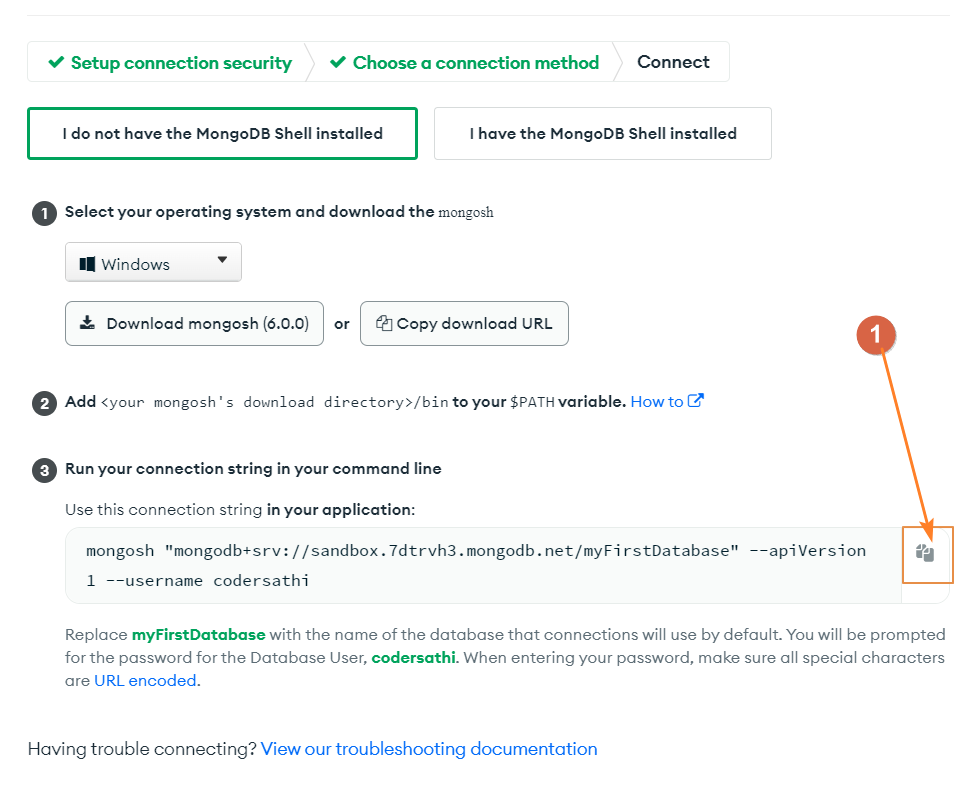
- I assume that you’ve copied the connection string but if you have installed MongoDB Shell the connection string would be:
mongo "mongodb+srv://sandbox.7dtrvh3.mongodb.net/myFirstDatabase" --apiVersion 1 --username codersathiAnd if you’ve installed the Mongosh then the connection would be:
mongosh "mongodb+srv://sandbox.7dtrvh3.mongodb.net/myFirstDatabase" --apiVersion 1 --username codersathiIf you have noticed on these two connection strings only the difference is mongo and mongosh.
- You can see the following screen when you paste the connection string into your command line or terminal
On my computer I’ve installed MongoDB Shell hence I will be using the following command:
mongo "mongodb+srv://sandbox.7dtrvh3.mongodb.net/myFirstDatabase" --apiVersion 1 --username codersathi
After pasting the connection string in the command line or terminal it asks for the password. Enter the correct password.
Once the password is matched you may see the following in your terminal.

It means that the connection to our Atlas Cluster is successful.
List databases
In this section, we will be using the following command to see a list of available databases in our MongoDB database cluster.
show databasesBy using, the above command we can see the list of databases.
Since we’ve already connected to our MongoDB Atlas cluster using MongoDB Shell let’s see the databases available there.
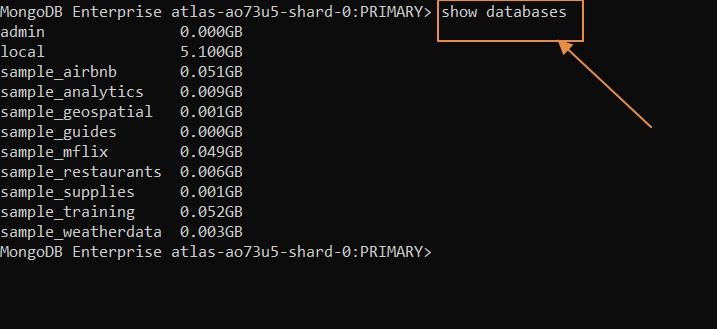
It shows all the available databases there.
Error: queryTxt ETIMEOUT
While connection to Atlas sometimes, we may see connection timeout error. And this error is very common.
If you encounter this error then our another post DNSHostNotFound: Failed to look up service “”: DNS name does not exist issue while connecting to MongoDb Atlas may help.
Summary
In this post, we learned to connect MongoDB Atlas Cluster using the MongoDB shell and we also learned to see the list of databases available there.