

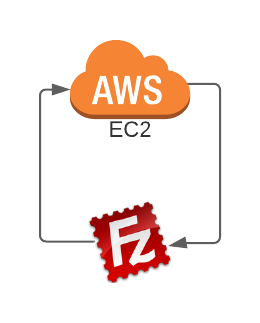
Amazon Web Services (AWS) Elastic Compute Cloud (EC2) provides a scalable and flexible cloud computing infrastructure for various applications. If you’re working with an AWS EC2 instance and need to transfer files from your local machine, you’ve come to the right place. This step-by-step guide will walk you through the process of uploading files to your AWS EC2 instance easily and securely.
Table of Contents
Objective
- To upload a file into EC2 instance.
Prerequisite
- EC2 instance is running.
- You already have a private key file.
- The port 22 is open
Solution
Upload using FileZilla
To upload a file using FileZilla we need to have it already installed on our computer. If you don’t have already installed on your computer then you can download it from https://filezilla-project.org/download.php and install.
I am assuming that the FileZilla is installed on your computer.
Steps:
- Open the FileZilla
- Go to File menu and click Site Manager
- Click on New site button (Most probably you can find it in left side)
- On the right select General tab.
- Choose the Protocol as SFTP (SSH File Transfer Protocol)
- Enter the value host name or the public IP address of the EC2 instance for Host and you can leave the port value blank.
- Logon Type choose Key file
- User ubuntu or ec2-user it depends on the AMI you have configured. Basically, if your ec2 instance is Ubuntu then the user would be ubuntu, ec2-user if it is Amazon Linux Ami and so on.
- On the Key file, click on Browse… button and select the PEM file you have saved for the EC2 instance.
- Now, click on Connect button. You should be able to connect to your EC2 instance with the FileZilla.
- When the connection is successful, you can see the FileZilla something like this image.
- You can upload the file from your local site to remote site. Let’s say, you want to upload a file in /home/ubuntu directory of your remote site then you can type /ubuntu/home in the remote site and hit enter.
- From the left side, you can choose your file and right click on it then click Upload. You should be able to see the status of the file upload in the bottom of the FileZilla.
Uploading using the SCP command
Step 1: Open a Terminal or Command Prompt
On your local machine, open a terminal (Linux/Mac) or a command prompt (Windows). This is where you will execute the necessary commands to transfer files to your EC2 instance.
Step 2: Set Permissions for the SSH Key Pair
For security reasons, you need to restrict access to your private key file (.pem). On your terminal or command prompt, navigate to the directory containing the .pem file and use the following command:
chmod 400 your-key-pair.pem
Replace “your-key-pair.pem” with the actual filename of your SSH key pair.
Step 3: Transfer Files to EC2 Instance
To transfer files from your local machine to the instance, you can use the secure copy (SCP) command. The basic syntax is as follows:
scp -i your-key-pair.pem /path/to/local/file ec2-user@your-ec2-public-ip:/path/on/ec2/instance
Let’s say, you want to copy your files in the home directory of your EC2 instance where the Ubuntu server is installed. For this you need to use the following command:
scp -i your-key-pair.pem C:\workspace\myfile\myfile.jar [email protected]:/home/ubuntuThe above command should copy the file myfile.jar from your location C:\workspace\myfile to your EC2 instance’s home directory using SCP.
Conclusion
Congratulations! You have successfully learned how to upload files to your AWS EC2 instance from your local machine using a FTP client like FileZilla and SCP.