In this tutorial, we will learn the process of setting up an EC2 instance with an Amazon CloudFront distribution, SSL certificate, and a Route 53 custom domain. This setup will help us improve the performance, security, and accessibility of our website or application.
Table of Contents
Prerequisites
Before we begin, make sure we have the following:
- An AWS account
- An EC2 instance already running
- A registered domain name
- An SSL certificate (we can obtain one from a certificate authority or use Amazon Certificate Manager)
Step 1: Create an Amazon CloudFront Distribution
Amazon CloudFront is a content delivery network (CDN) that helps distribute our website content across multiple edge locations worldwide. It improves the performance of our website by caching content closer to our users.
To create a CloudFront distribution:
- Go to the AWS Management Console, search CloudFront and navigate to the this service.

- Click on “Create Distribution”.

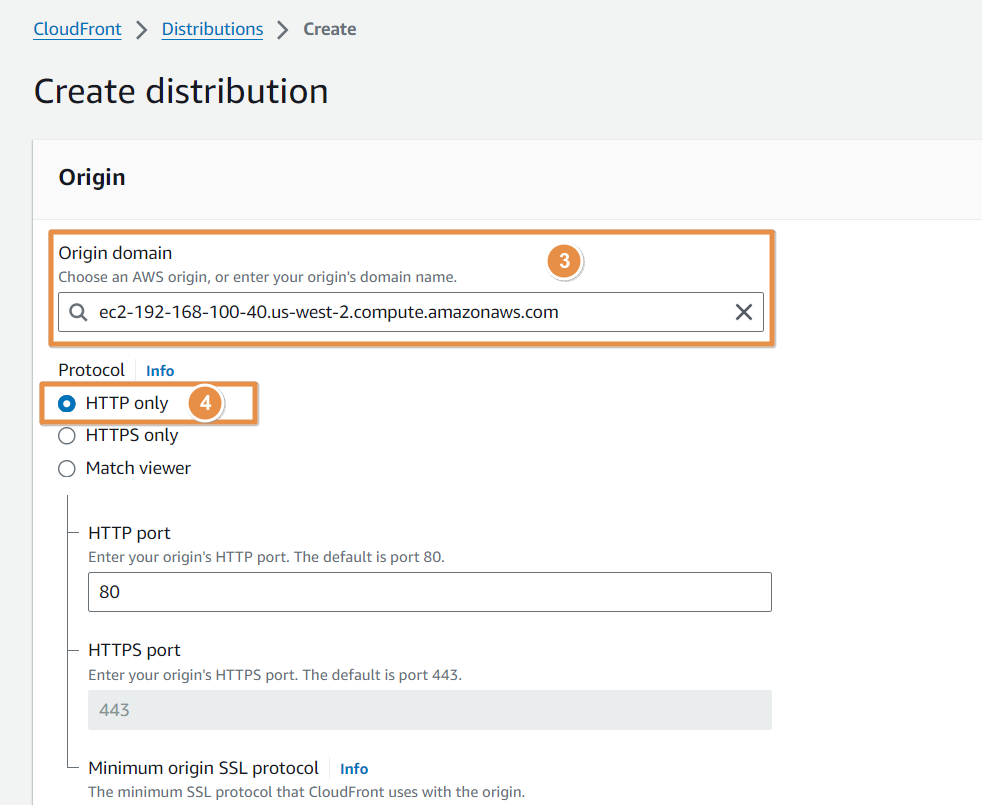
- On Origin Domain: Enter the public IP Address DNS of your EC2 instance. It looks like:
ec2-192-168-100-40.us-west-2.compute.amazonaws.com
- Protocol: Select HTTPS Only if you want to use only HTTPS otherwise you can choose as your need. Remember: If your origin has http then you must select HTTP Only and this is the default setting as well.
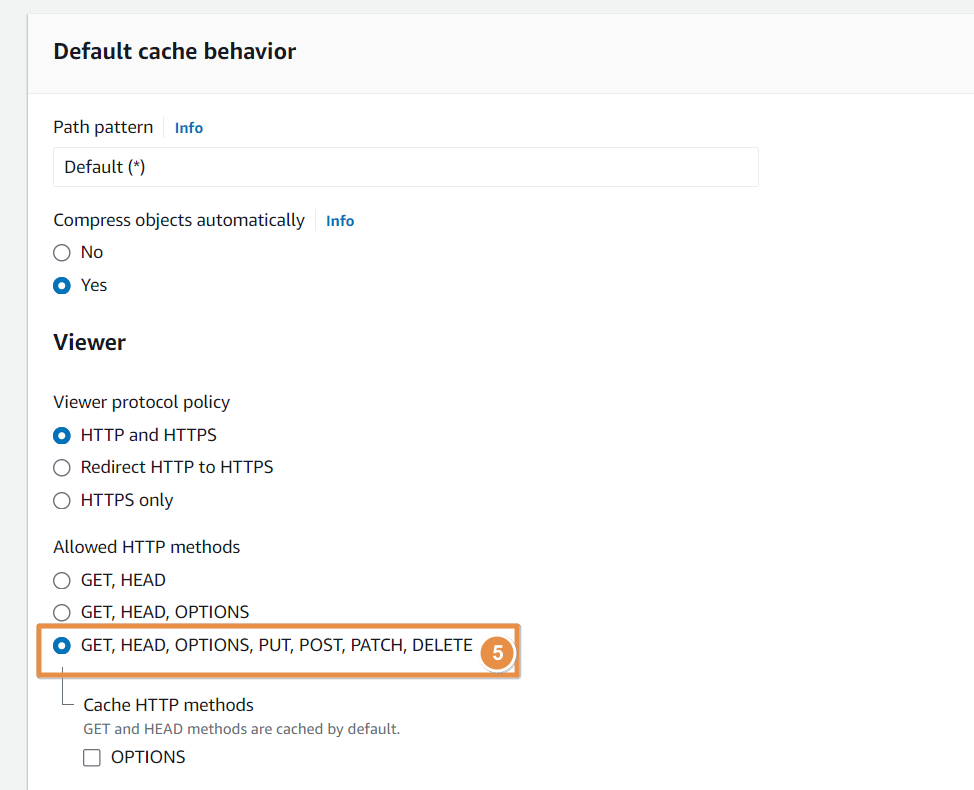
- Go to Default cache behaviour and select: GET, HEAD, OPTIONS, PUT, POST, PATCH, DELETE if you want to all method to be allowed or you can change as your need. In my EC2 I want to allow all the method to be allowed . Hence, I am selecting this.
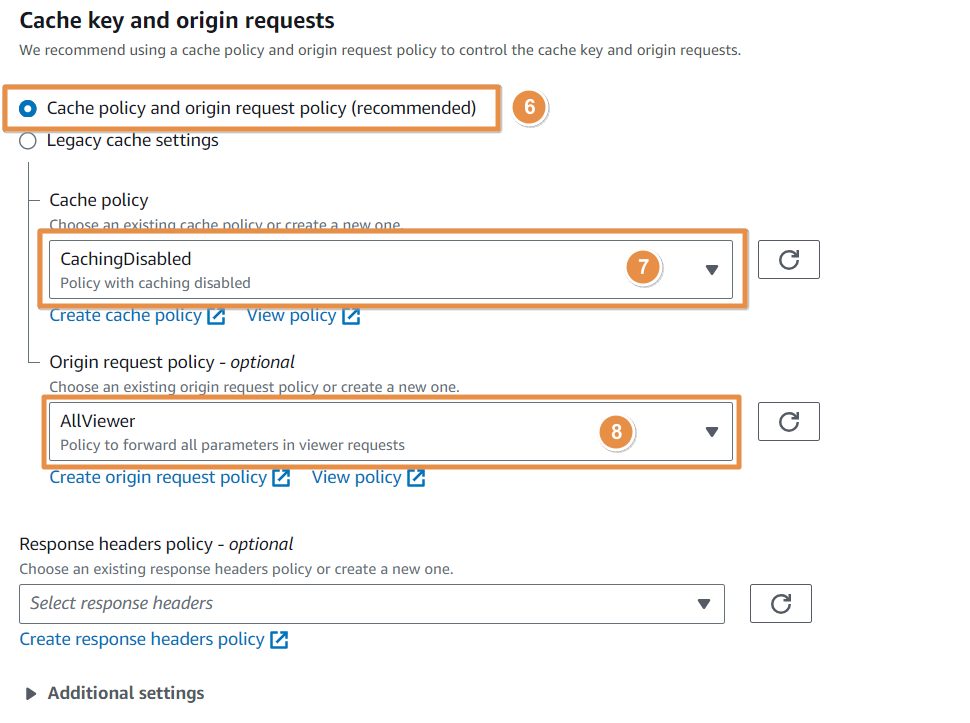
- On Cache key and origin requests, leave Cache policy and origin request policy (recommended) as default selected.
- On Cache Policy, select CachingDisabled for the simplicity of this guide.
- On Origin request policy – optional, you can select AllViewer. Remember to choose that best suits to your requirement.
- Now go to Web Application Firewall (WAF) and either select enable WAF or Do not enable security protections. In this example, I am disabling it by selecting Do not enable security protections.

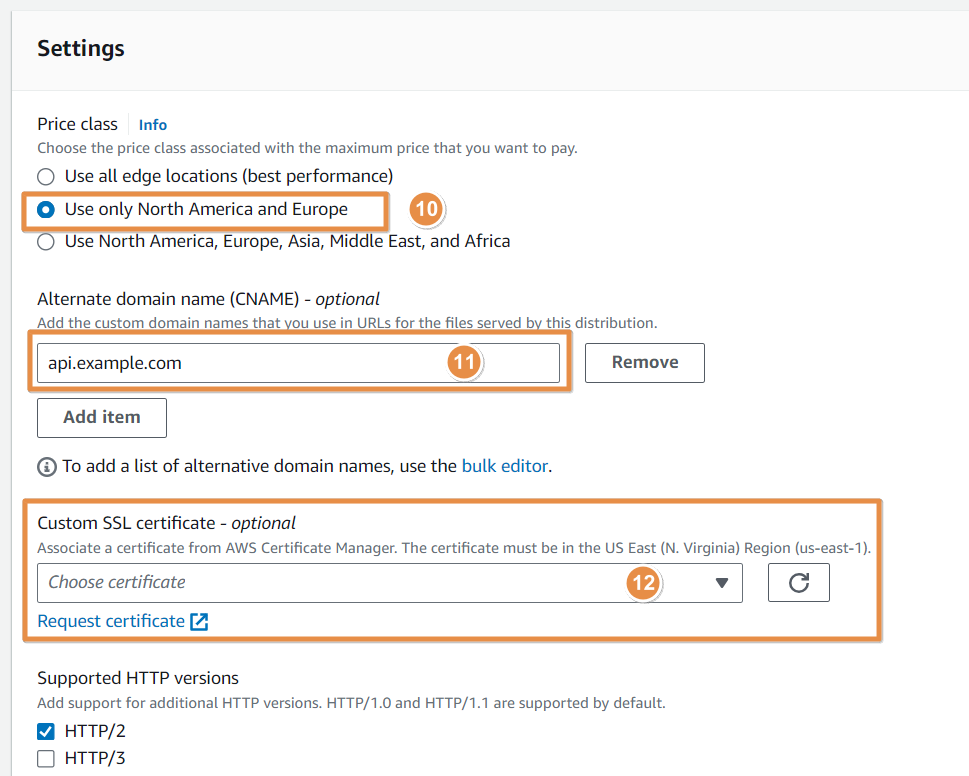
- Settings: I would choose Use only North America and Europe. This is because cheaper than others. You can select as per your need.
- On Alternate domain name, I will give my domain api.example.com. You can leave it as blank or input your domain name that will be used to access your EC2 instance.
- Custom SSL certificate you can select from the drop down that matches your domain. In this case I can select *.example.com. this applies SSL to my domain api.example.com. To use this, you need to have already requested certificate in us-east-1 region by going AWs Certificate manager.
Note
It is important to note that, if we request certificate from other than us-easte-1 region it does not show up here.
- Leave everything default. On the description you can give your meaningful name to remember in future. I would give it as Enabling SSL to API for my EC2
- Review and confirm your settings, then click on “Create Distribution”.
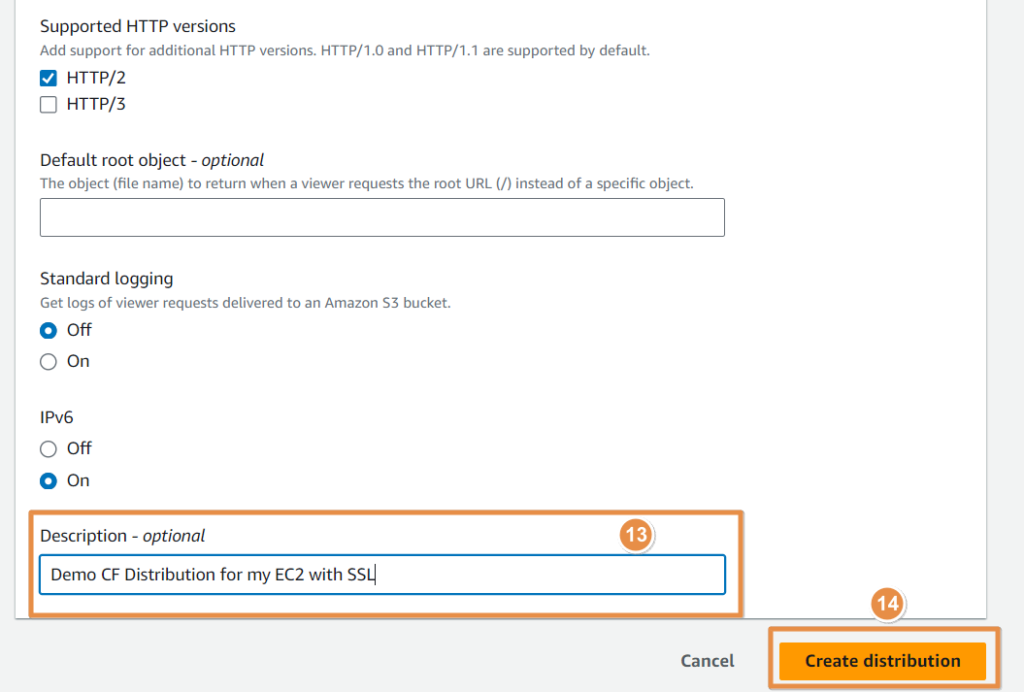
- If may take some time to deploy CloudFront distribution. After couple of minutes it should be deployed successfully.
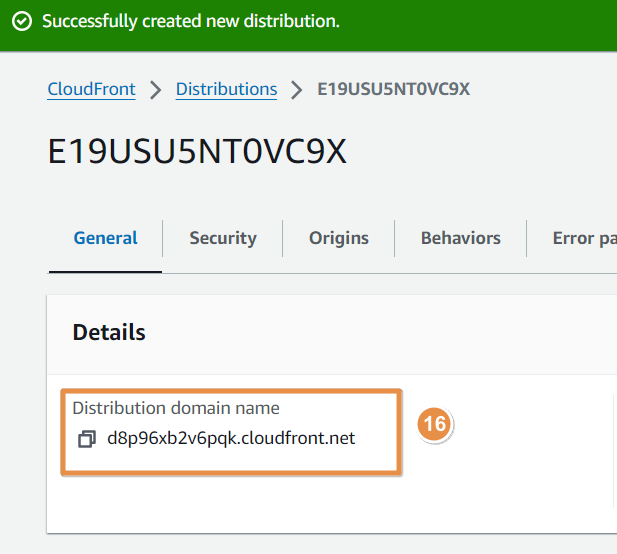
- Nagivate to distribution list and select newly creted distribution. On the General tab, we can see Distribution domain name. Copy this and paste in the browser. We should be able to access application running in our EC2 instance with port 80.
Step 2: Configure Route 53 Custom Domain
Route 53 is Amazon’s scalable domain name system (DNS) web service. It allows us to manage and route traffic to our domain names.
To configure a Route 53 custom domain:
- Go to the AWS Management Console and navigate to the Route 53 service.
- Click on “Hosted Zones”
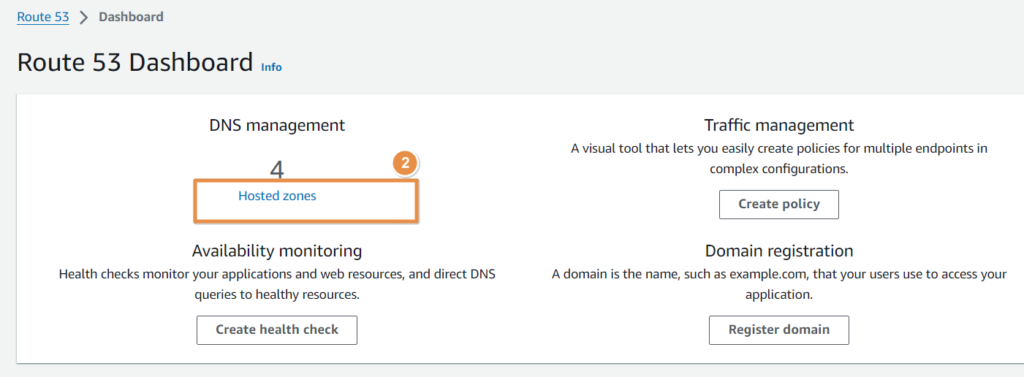
- Create a new hosted zone for your domain name by clicking Create Hosted zone.

- On Hosted zone configuration give your domain name. For example: example.com
- Make sure to select Public hosted zone. (If you are setting up only for your internal network then you can select Private hosted zone. In our case, we need to access our application running in EC2 publicly)
- Click Create hosted zone.
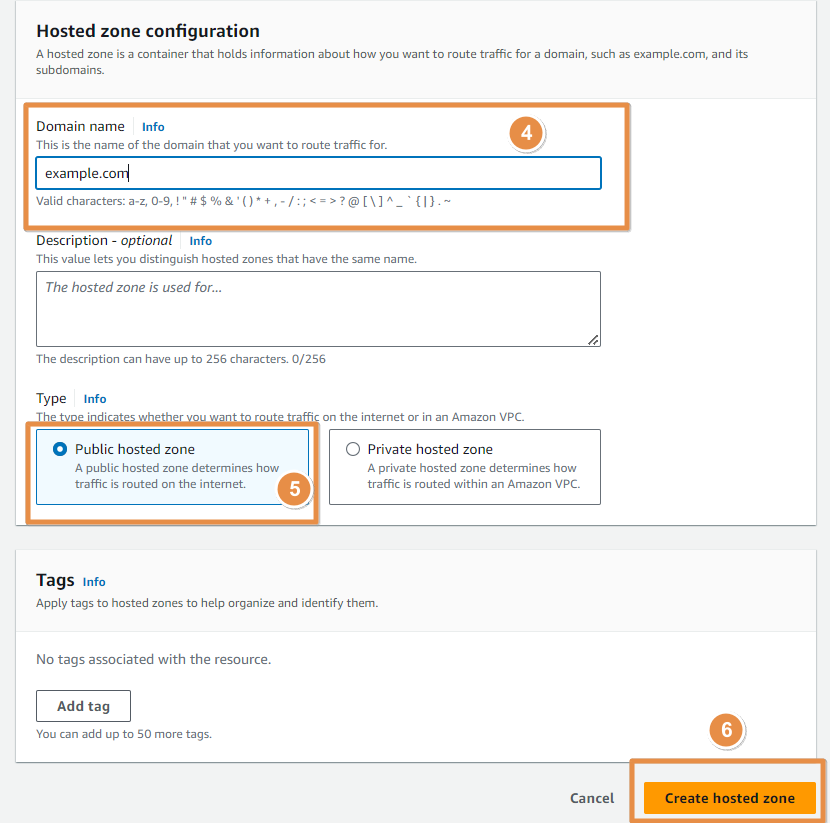
- Once the hosted zone is created, note down the nameservers provided by Route 53.
- Go to your domain registrar’s website and update the nameservers for your domain to point to the Route 53 nameservers.
- Back in Route 53, create a new record set for your domain name.
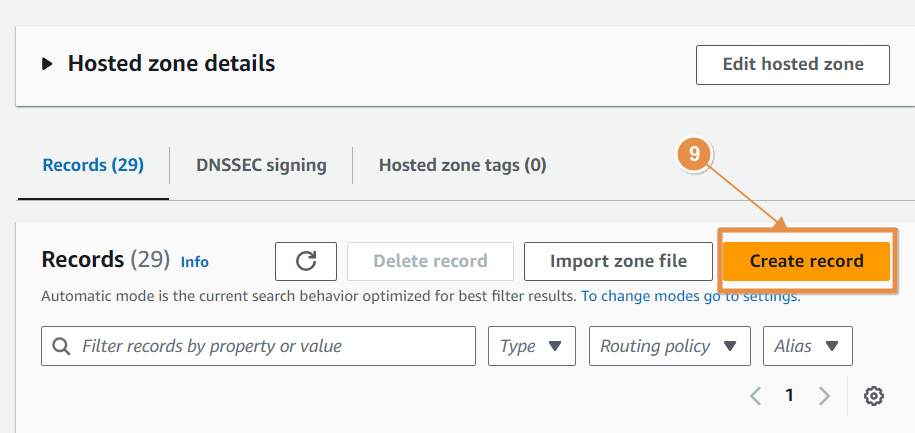
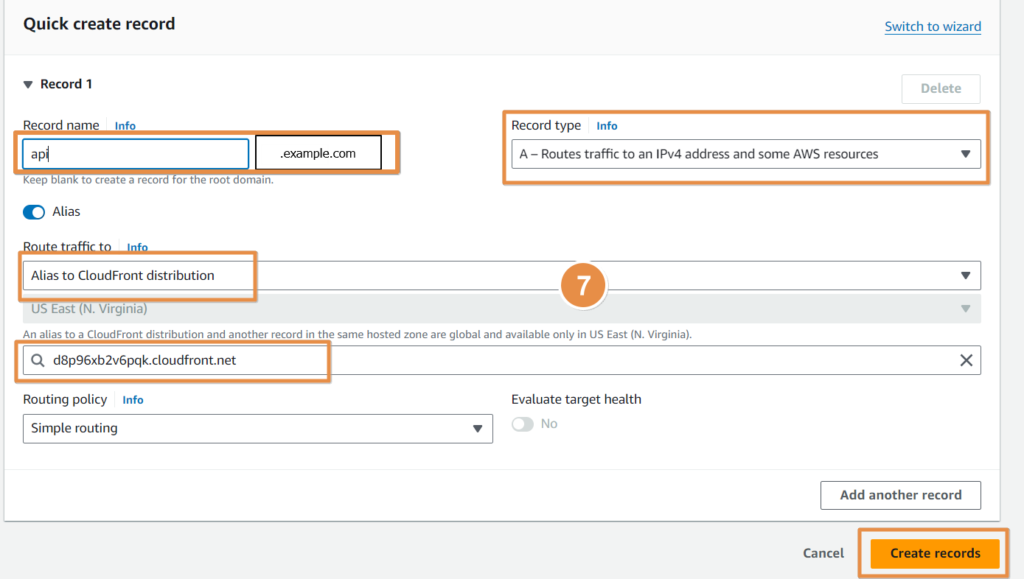
- Choose the type of record (e.g., A record) and configure it to point to your CloudFront distribution.
- Record name: api
- Record type: A
- Select Alias
- Route traffice to: Choose endpint Alias to CloudFront distribution
- Choose distribution: From the list. or you can paste the cloudfront distribution domain name copied from above image 16.
Step 4: Test and Verify
Once we have completed the above steps, you can test and verify our setup.
- Wait for the changes to propagate (DNS changes may take some time to propagate).
- Visit your custom domain (Ex. api.example.com) in a web browser and check if your website is accessible.
- Verify that your website is using SSL by checking for the padlock icon in the browser’s address bar.
Conclusion
Setting up an EC2 instance with an AWS CloudFront distribution, SSL certificate, and a Route 53 custom domain is a powerful combination that improves the performance, security, and accessibility of our website or application. By following the steps outlined in this tutorial, we can easily configure these services and enhance our online presence.
Happy CloudFronting! 🙂
FAQs
What is Amazon EC2?
Amazon Elastic Compute Cloud (EC2) is a web service that provides resizable compute capacity in the cloud. It is designed to make web-scale cloud computing easier for developers
What is Amazon CloudFront?
What is SSL?
SSL (Secure Sockets Layer) is a standard security technology for establishing an encrypted link between a server and a client. SSL ensures that all data passed between the server and the client remains private and secure
What is Route53?
Amazon Route 53 is a highly available and scalable cloud Domain Name System (DNS) web service that translates domain names to IP addresses.
What is a custom domain?
How can I set up an EC2 instance with Amazon CloudFront distribution, SSL, and Route 53 custom domain?
You can follow the steps outlined in this tutorial. It provides a detailed guide on how to set up an EC2 instance with an Amazon CloudFront distribution, SSL certificate, and a Route 53 custom domain.