In this post, we will learn to create a cluster in MongoDB Atlas. We will not learn what is MongoDB Atlas and why we need it in this post. So. let’s start creating a cluster directly.
Steps to create a cluster in MongoDB Atlas
- Click on the link https://account.mongodb.com/account/login and log in. If you don’t have an account already then create an account first.
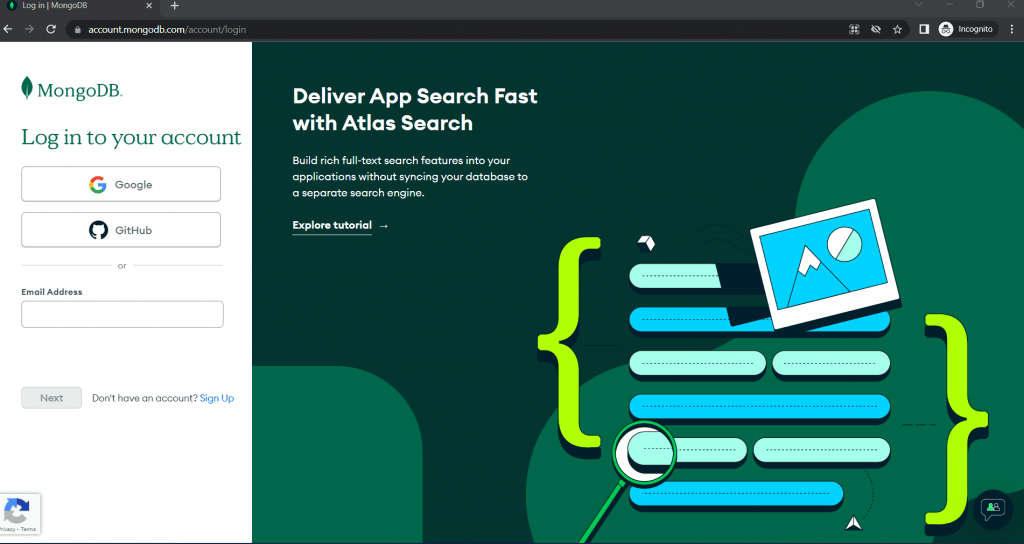
- When you create your account it will create a default organization and project automatically.
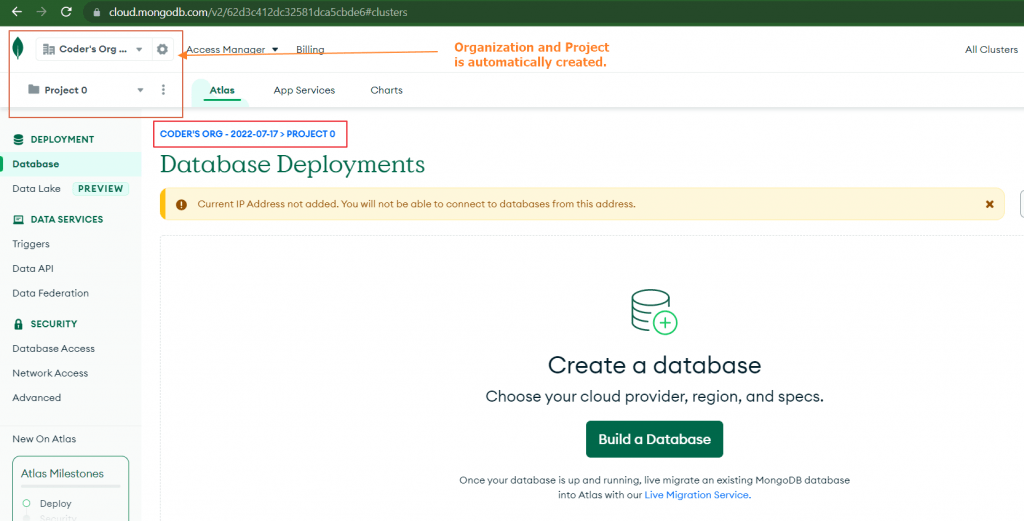
But in this tutorial, we will start by creating a new organization ourselves.
- Go to the top left and click on your default organization.

- After clicking this a small popup displays. Click on View All Organizations.

- After clicking this, you may see the following page. Click on Create New Organization button.

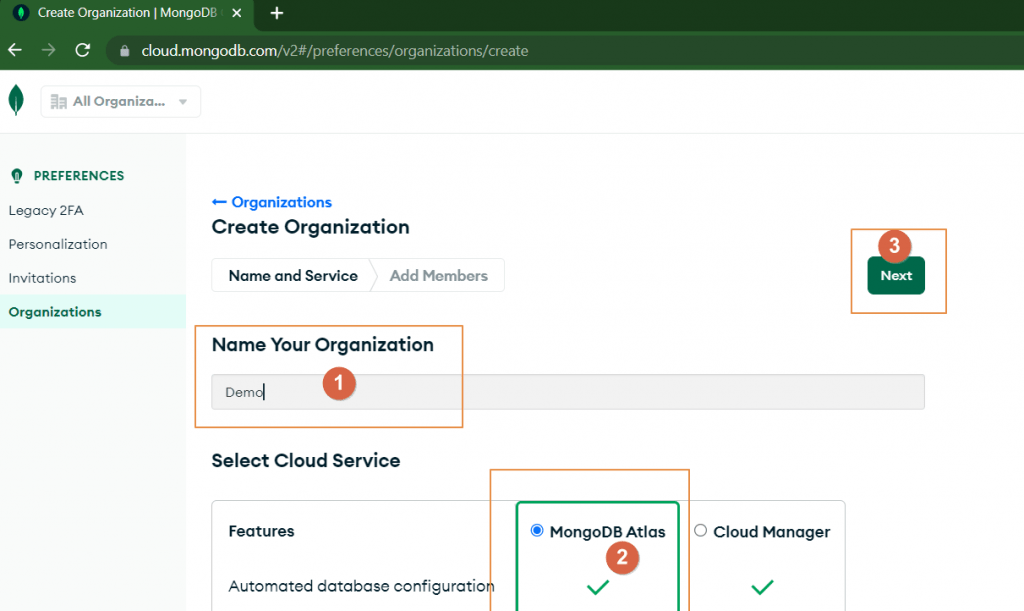
- Type your organization name in the Name Your Organization field. Select MongoDB Atlas Service and click the Next button.
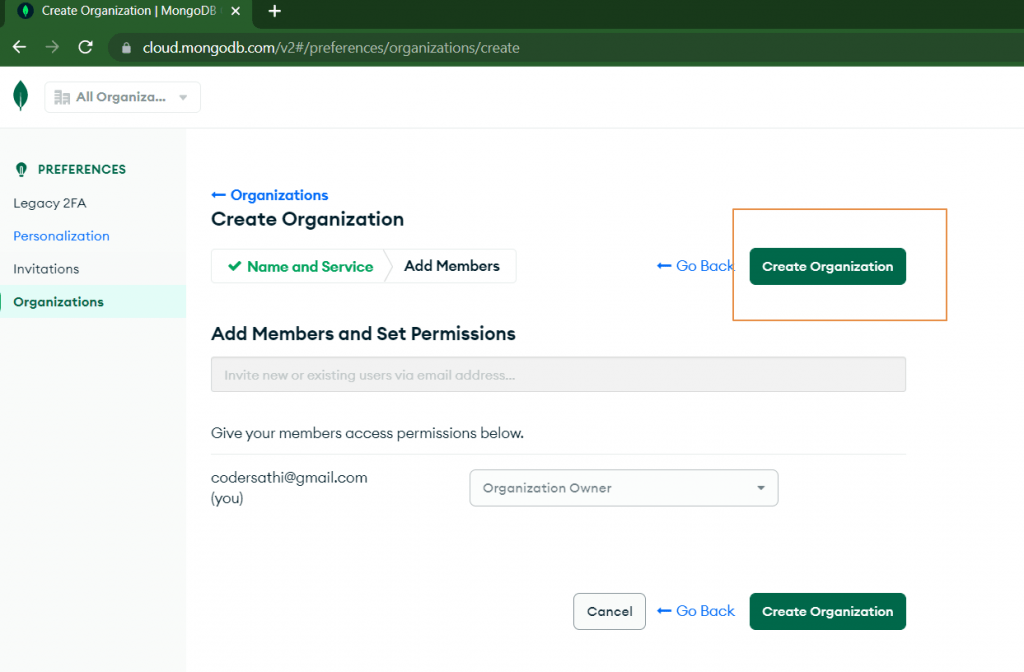
- Click Create Organization button.
- After creating the organization it will redirect to the Projects page from where we can create multiple projects. Click on New Project button.
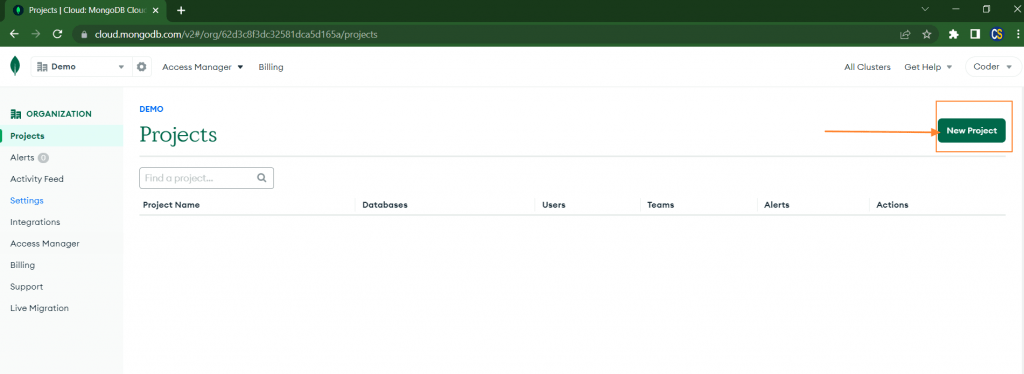
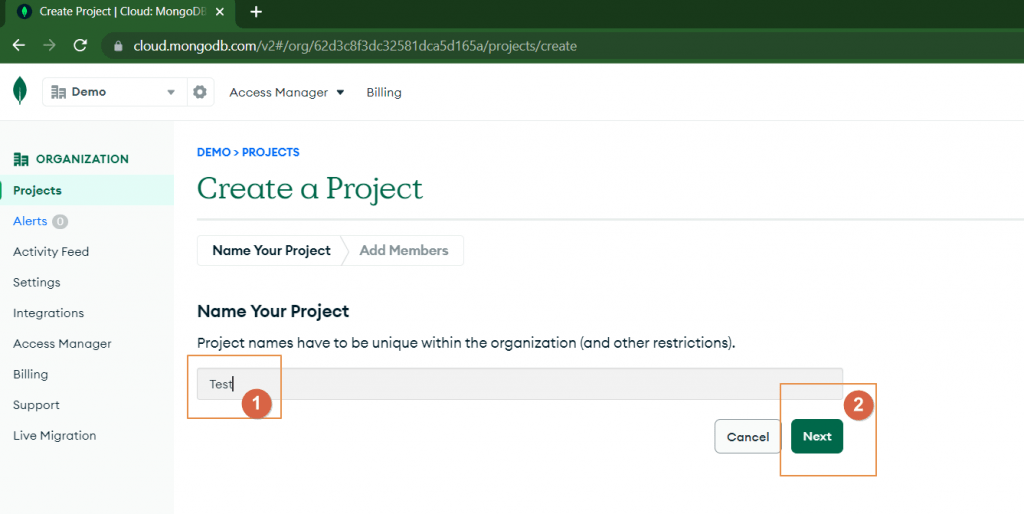
- Type your project name and click Next button.
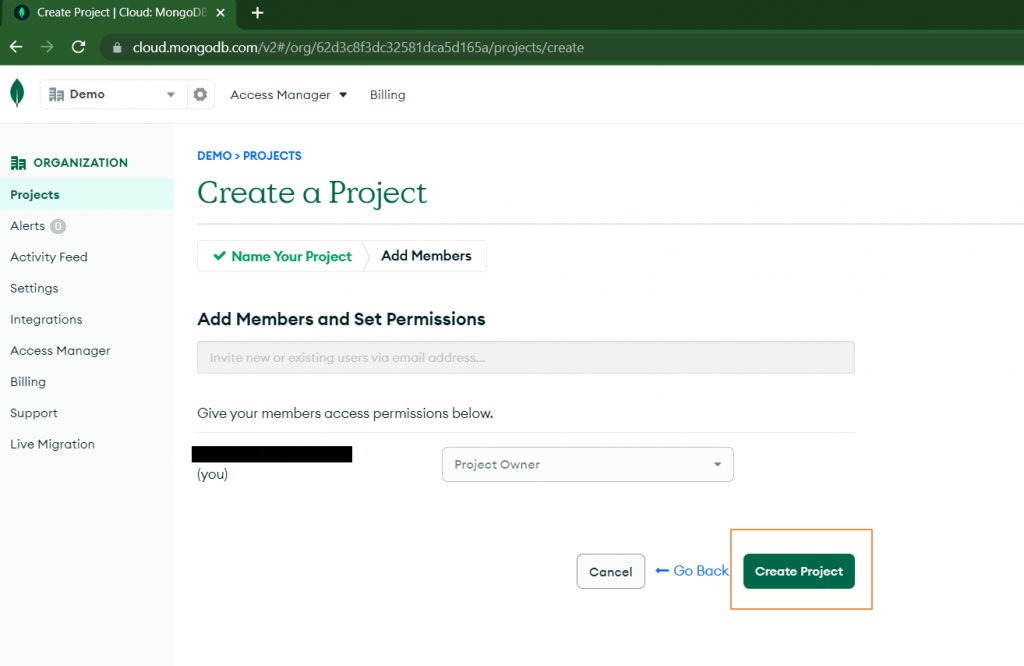
- If you want to add other members to your project you can add otherwise click Create Project button.
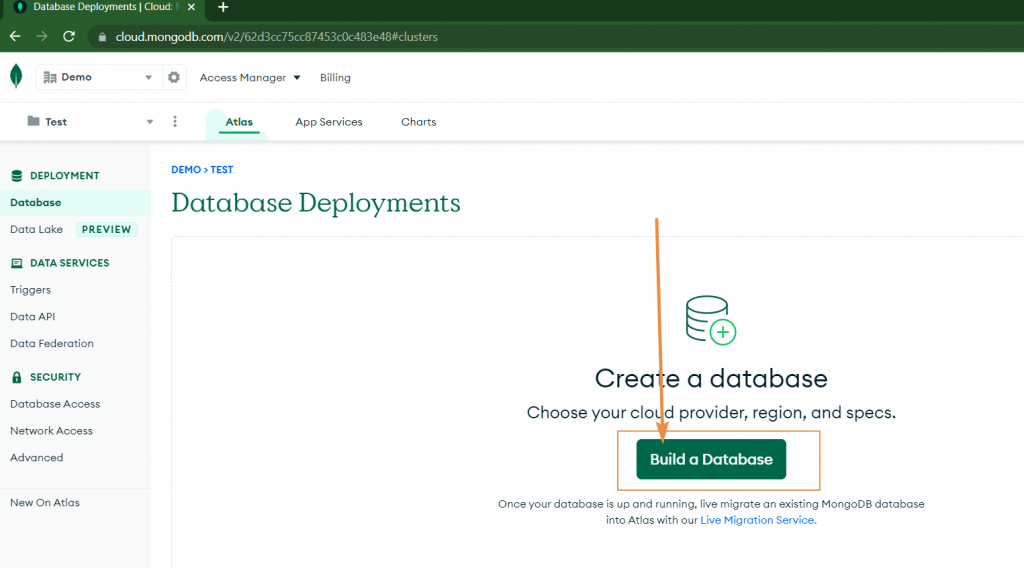
- The project is created. Now, it’s time to deploy a database. Create on Build Database.
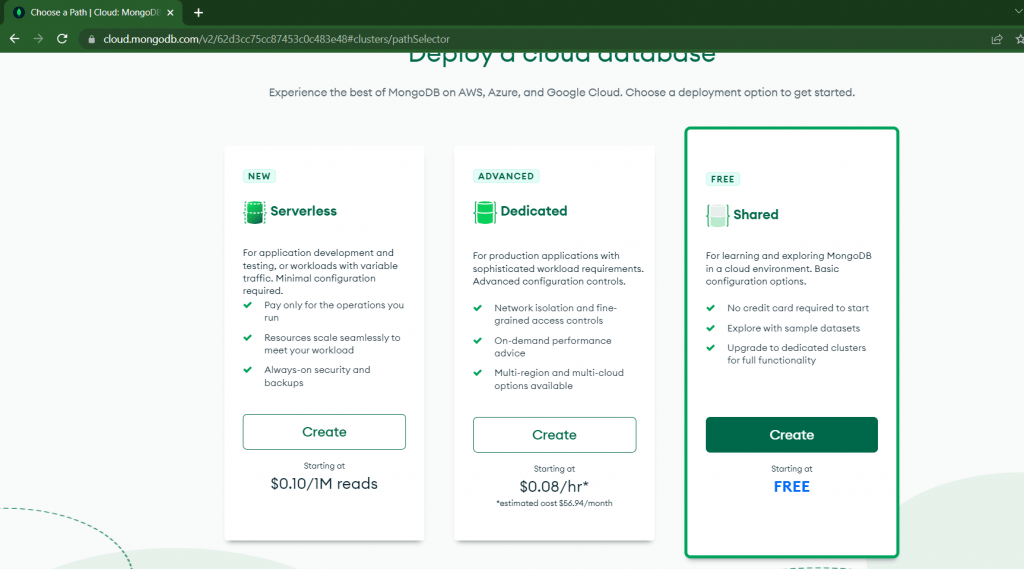
- There are various types of deployments. In this tutorial, we will create a Shared cluster which is free. Choose Shared and click on Create.
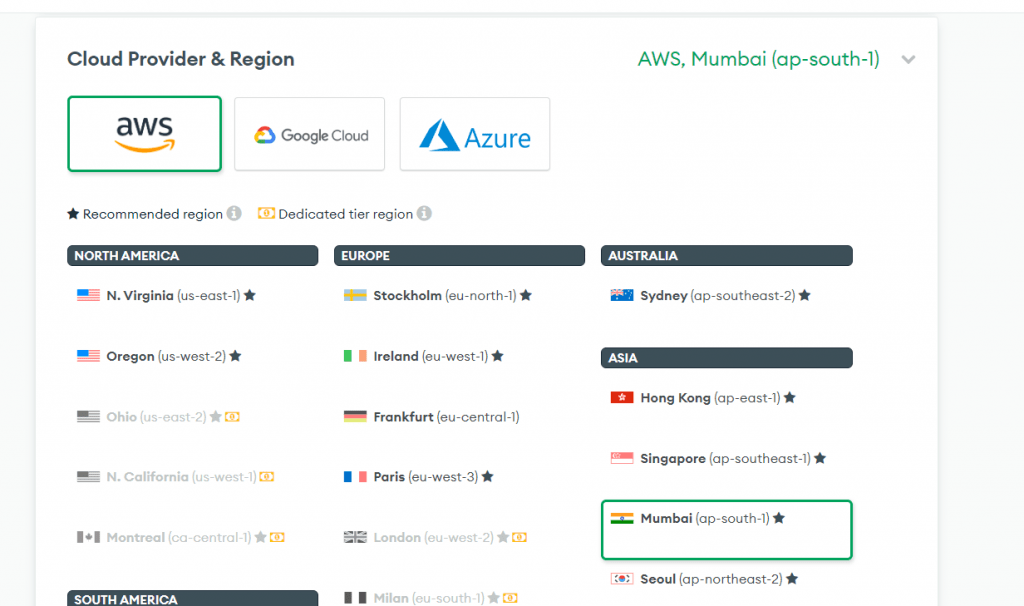
- It’s time to choose a cloud provider. In this step, I will choose AWS and Mumbai region. You can choose your preferred region.
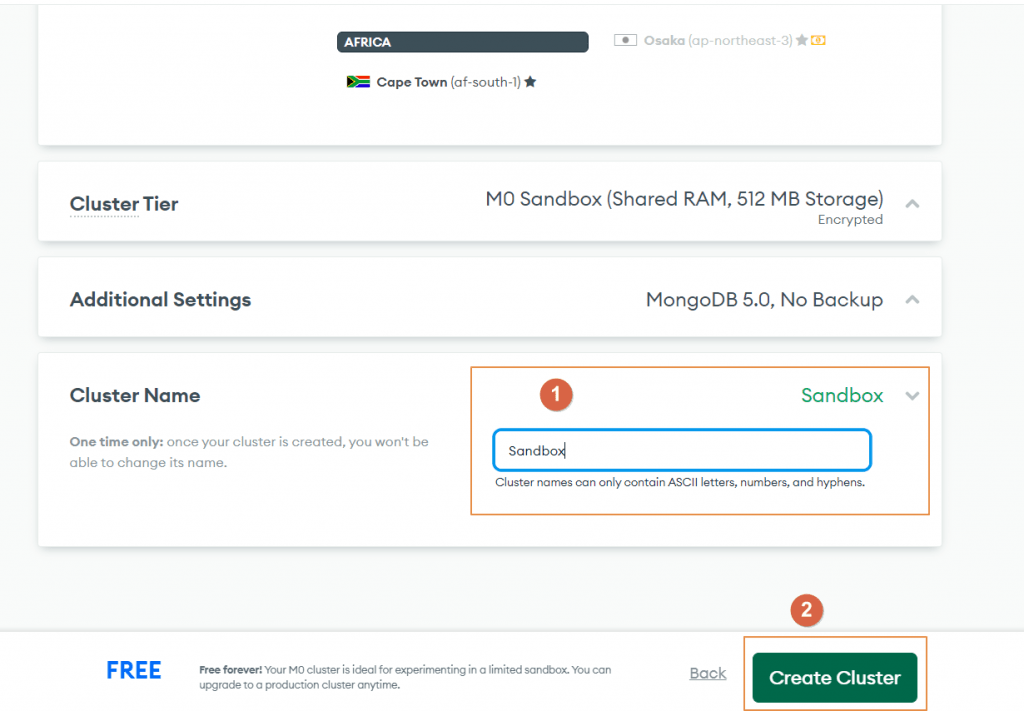
- Scroll down and leave Cluster Tier and Additional Settings as default. Since we are creating a free cluster we don’t have to change anything there.
- Click on Cluster Name and give it a Sandbox.
- Click Create Cluster button.
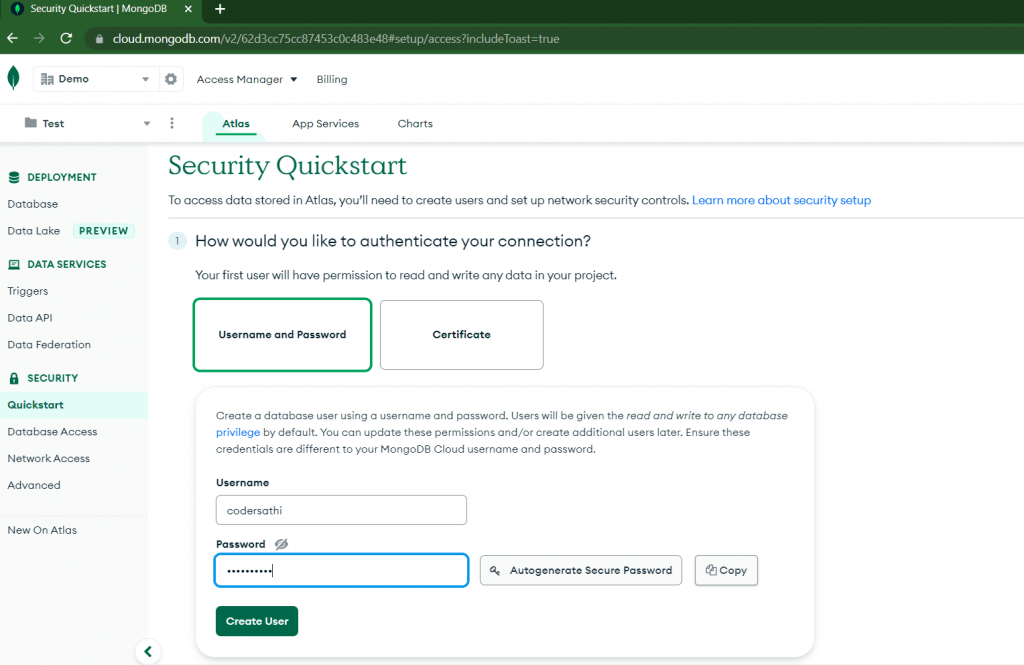
- Next, we have to provide a database username and password in Security Quickstart to access our database. Give proper username and password and remember your password. Then click Create User button.
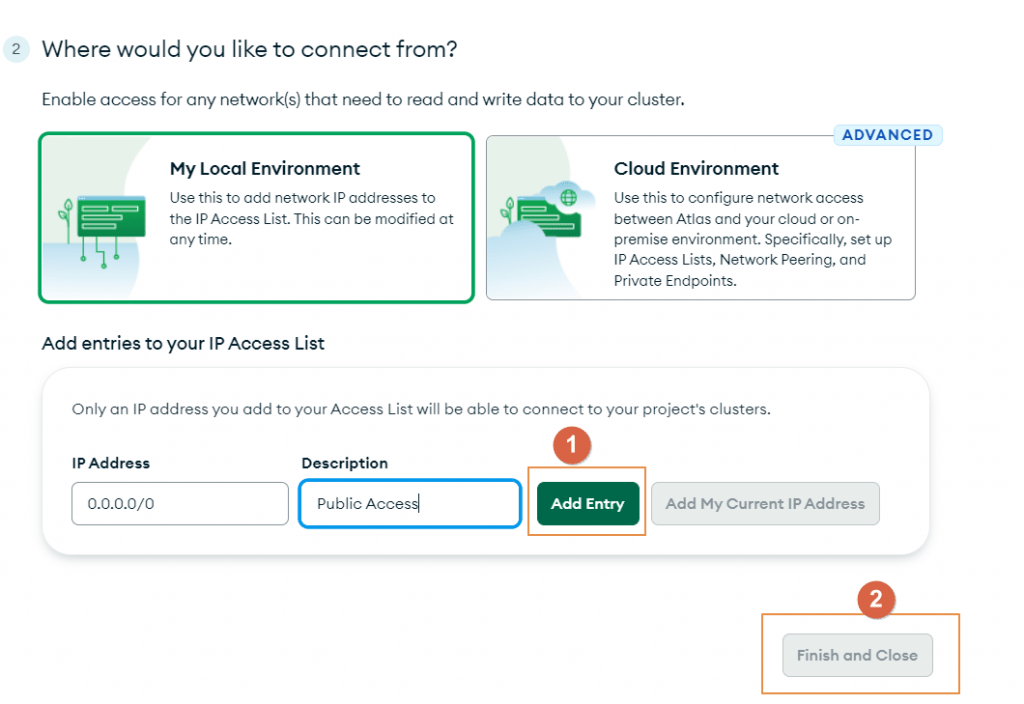
- In the section Where would you like to connect from? Choose your environment. In this tutorial, we will be using Local Environment. If you want to connect to your cloud you can select Cloud Environment where you will set up VPC peering and other stuff to connect from your Cloud environment to Atlas.
- After choosing your environment, add your IP address from where you want to connect. If you want to make it public you can set 0.0.0.0/0. For the production environment, we are likely to avoid using 0.0.0.0/0. But for this example, we can add.
- Click on Add Entry button and click Finish and Close.
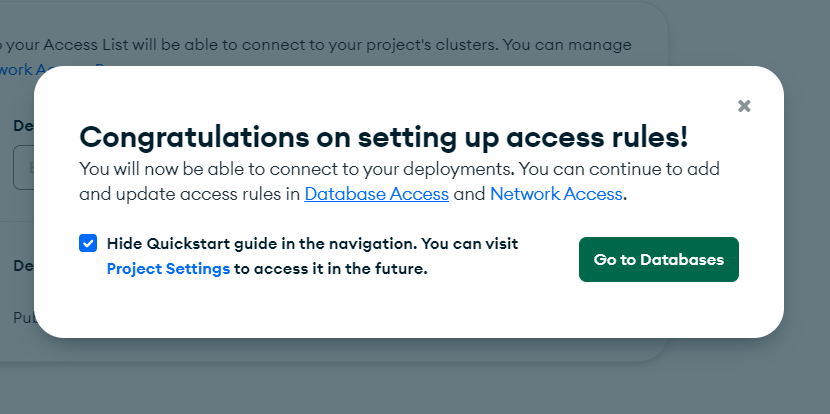
- After clicking Finish and Close you may see a screen like the below. You can click on Goto To Database.
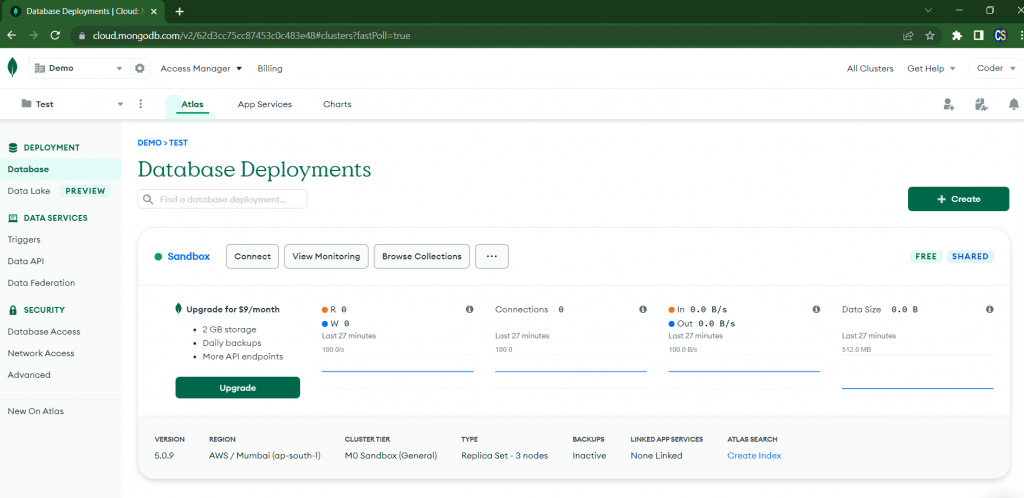
- You may see a page below.
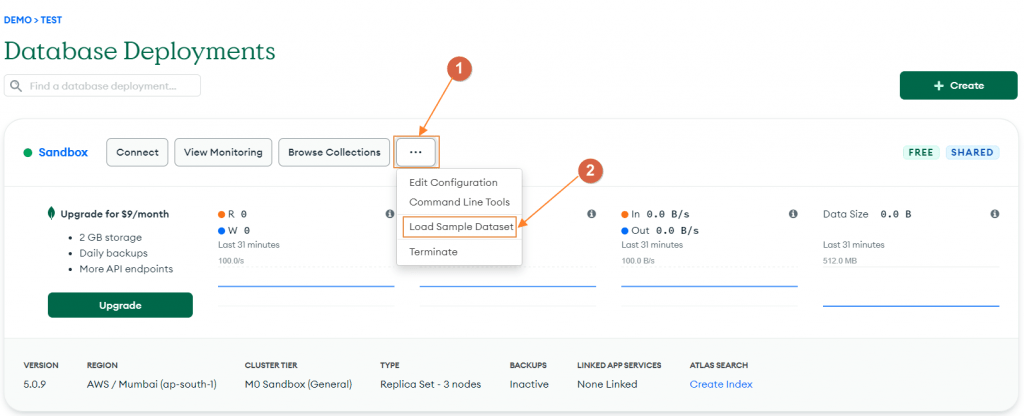
- The great thing about Atlas is that it provides sample data sets to play with it. So, let’s load the sample data set in our database cluster. See the image below:
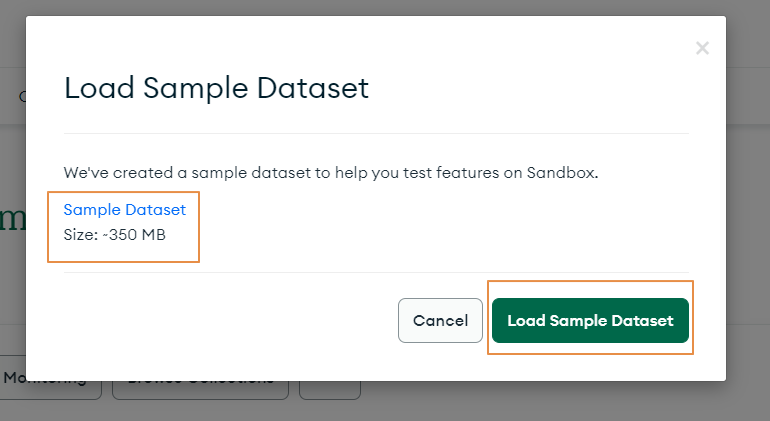
- After clicking Load Sample Dataset you may see a popup with the sample data set size. Click on the Load Sample Dataset button.
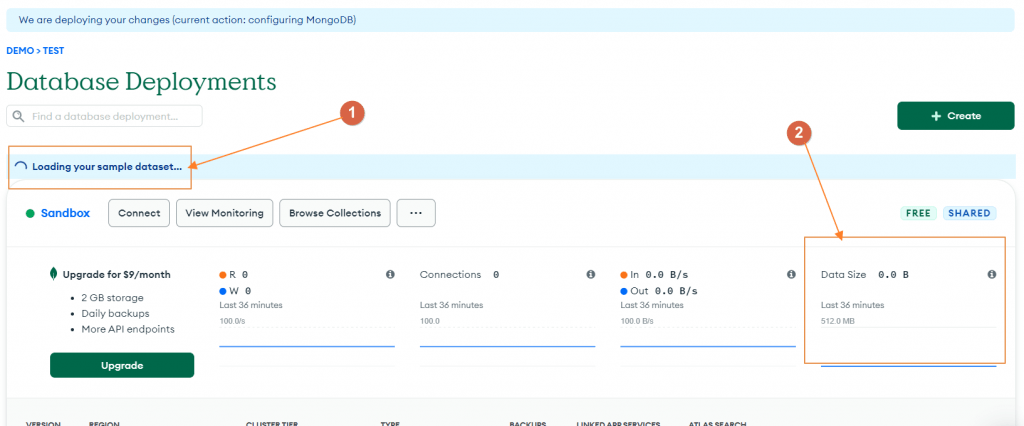
- It starts loading the sample data set. It may take a couple of minutes to load completely. When it is completed you may see the increased Data Size on the right side. Currently, the Data Size is 0.0 MB. The value will be changed once the data loading is finished.
- After a couple of minutes, the loading process finishes and the data size will be increased. See the image below:
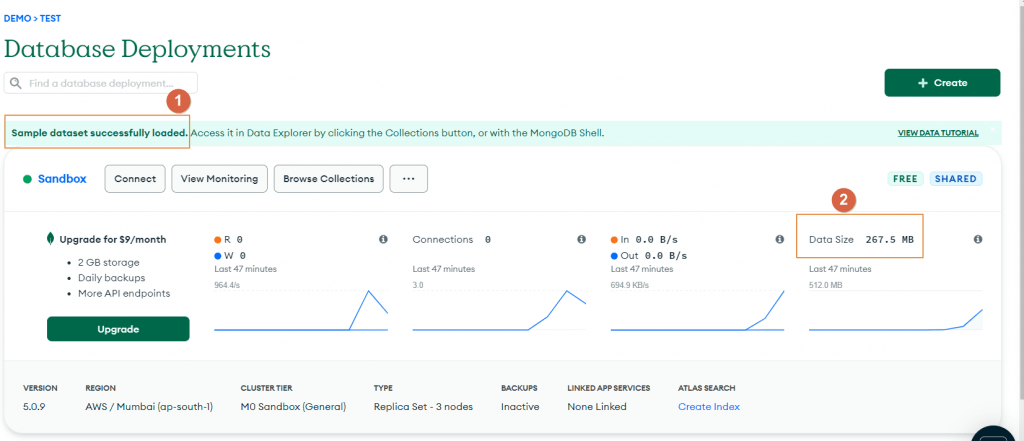
Congratulations, you have successfully created a cluster and also loaded a sample data set into it.
Conclusion
In this post, we learn to create clusters in the Atlas by following the steps given. Now, you can visit another post to connect Atlas cluster using the shell command.