Setting up Eclipse with Tomcat Server for Java Web Development is straightforward. In this blog post, we will learn how to set up eclipse with tomcat server for Java server side programming.
Table of Contents
Step 1: Download and Install Eclipse
- Visit the Eclipse Download Page: Go to the official Eclipse Downloads page.
- Download Eclipse IDE for Java EE Developers: Choose the version that matches your operating system (Windows, macOS, or Linux).
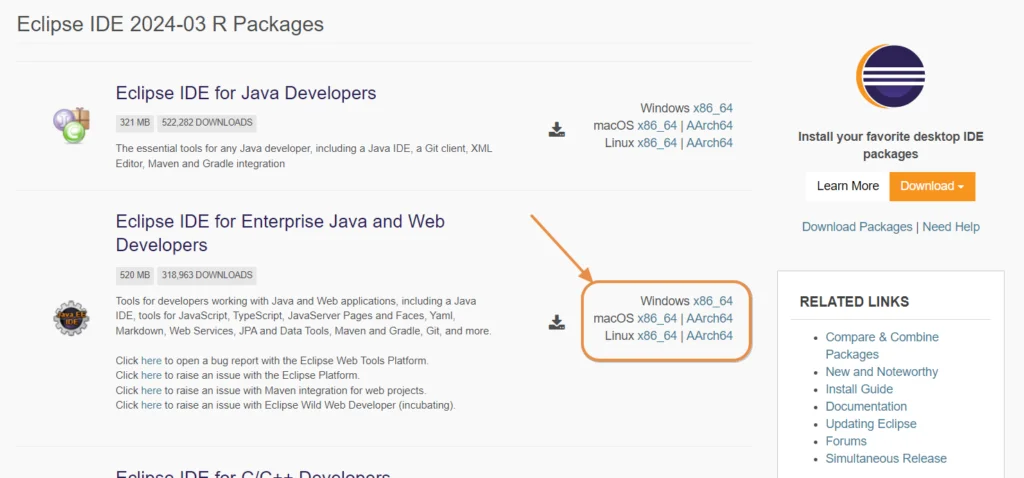
- Install Eclipse:
- Windows: Run the
.exeinstaller and follow the prompts. - macOS: Open the downloaded
.dmgfile and drag Eclipse to the Applications folder. - Linux: Extract the downloaded
.tar.gzfile and run theeclipseexecutable.
- Windows: Run the
Step 2: Download and Install Apache Tomcat
- Visit the Tomcat Download Page: Go to the official Tomcat Downloads page.
- Download Tomcat: Choose the Core binary distribution (e.g.,
apache-tomcat-9.0.xx.zip).
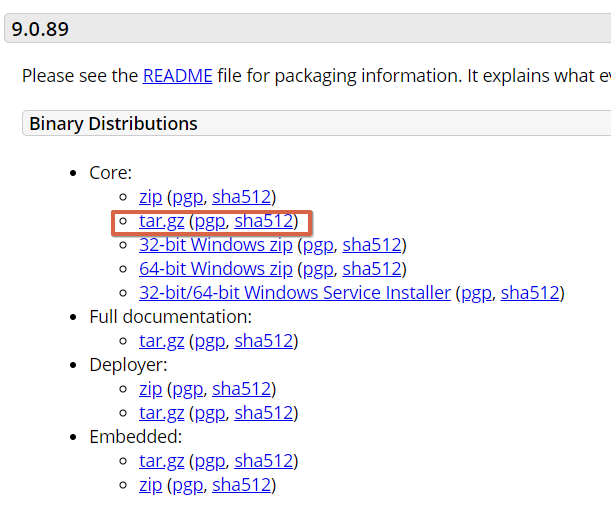
- Extract Tomcat:
- Windows: Right-click the downloaded ZIP file and select “Extract All”.
- macOS/Linux: Use a terminal to run
unzip apache-tomcat-9.0.xx.zip. - And rename root folder to
tomcat9(Optional)
- Save in your prefered location. For windows save it inside C drive. Example:
C:/tomcat9
More detail to install tomcat.
Step 3: Configure Tomcat in Eclipse
- Open Eclipse: Launch Eclipse and select a workspace directory. I would prefer to save on c:/workspace. It is up to you where you want to set your workspace.
- Configure Tomcat Server in Eclipse:
- Go to
Window>Show View>Servers.
- Go to
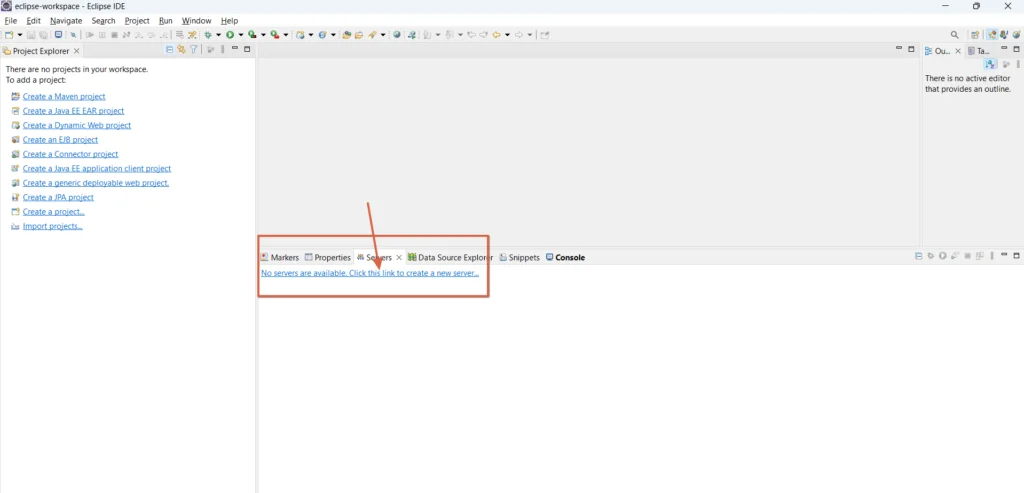
- Create a new server:
- Click on the link that says: No server are available. Click this link to create a new server.
- Choose
Apache>Tomcat v9.0 Server(or the version you downloaded) and clickNext.
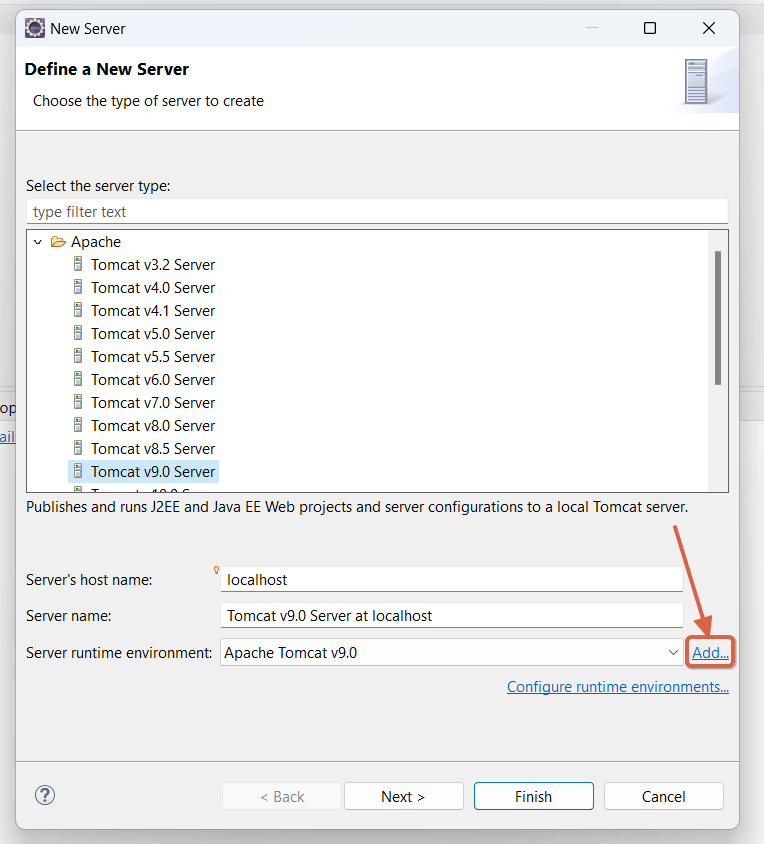
- Set the Tomcat installation directory to the folder where you extracted and saved Tomcat.
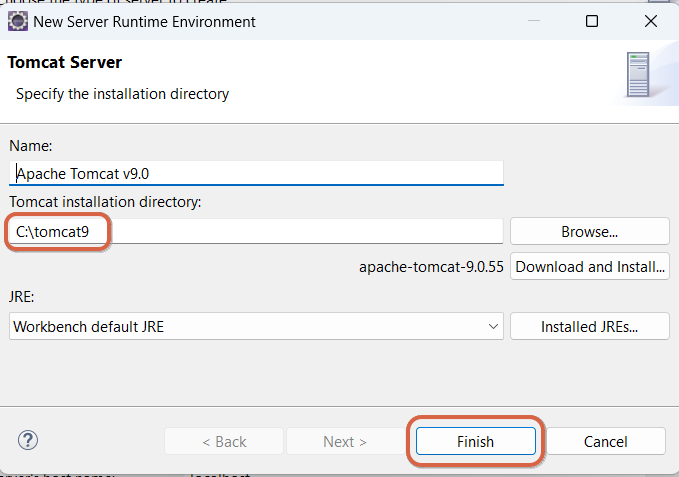
- Click
Finish.
Step 4: Verify Tomcat Installation
- Right click on the server and click start.
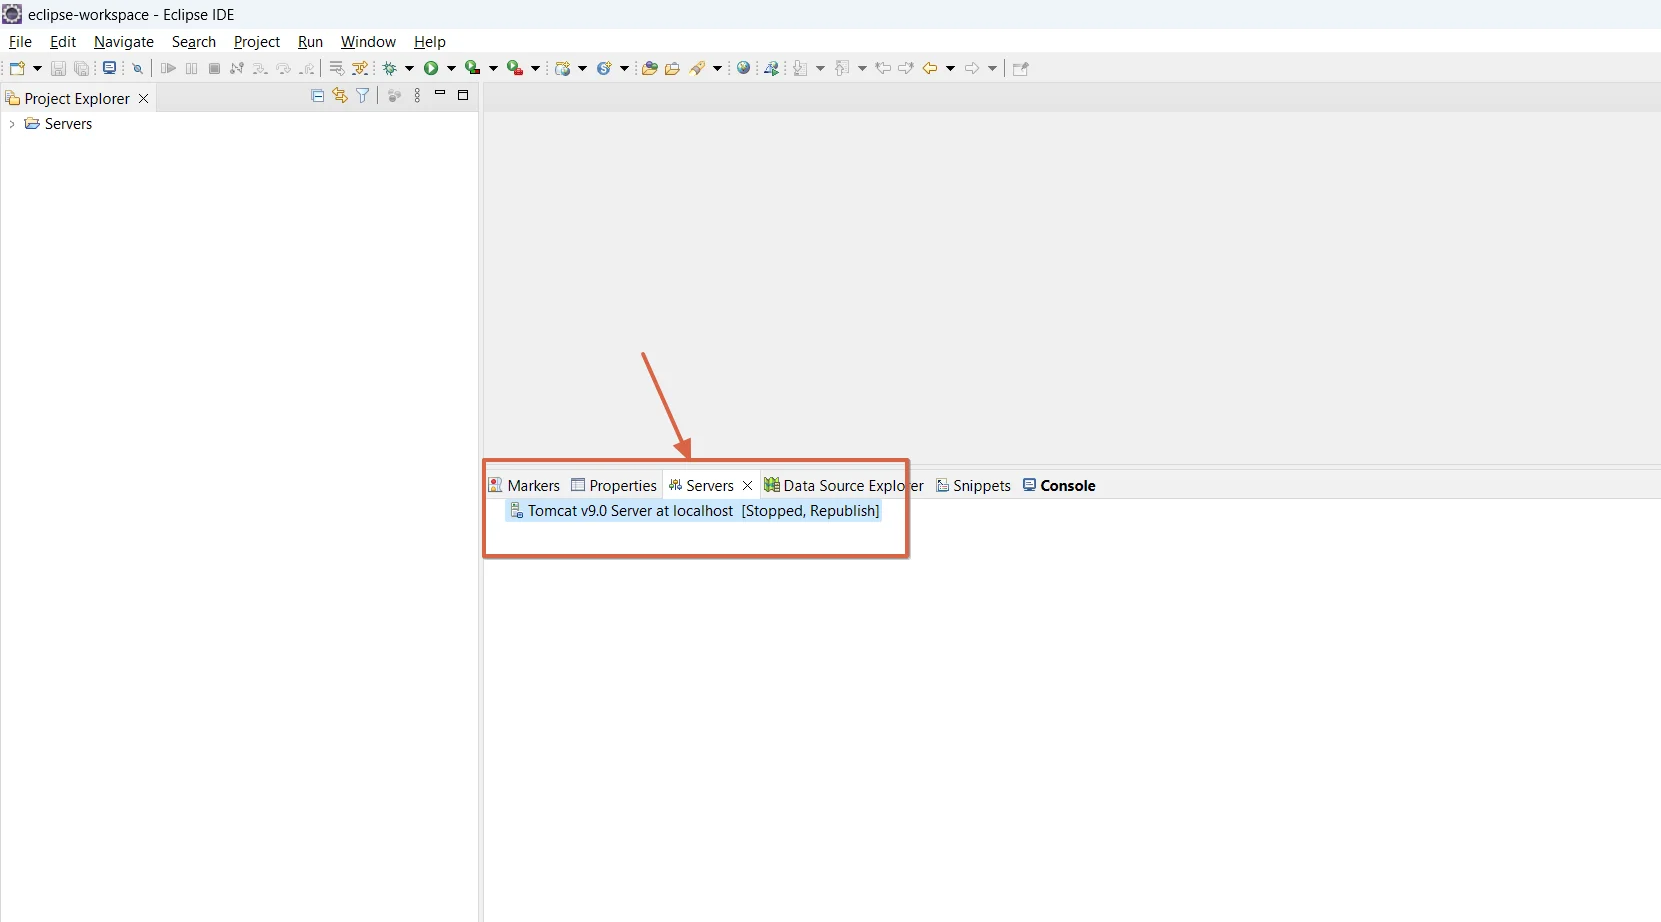
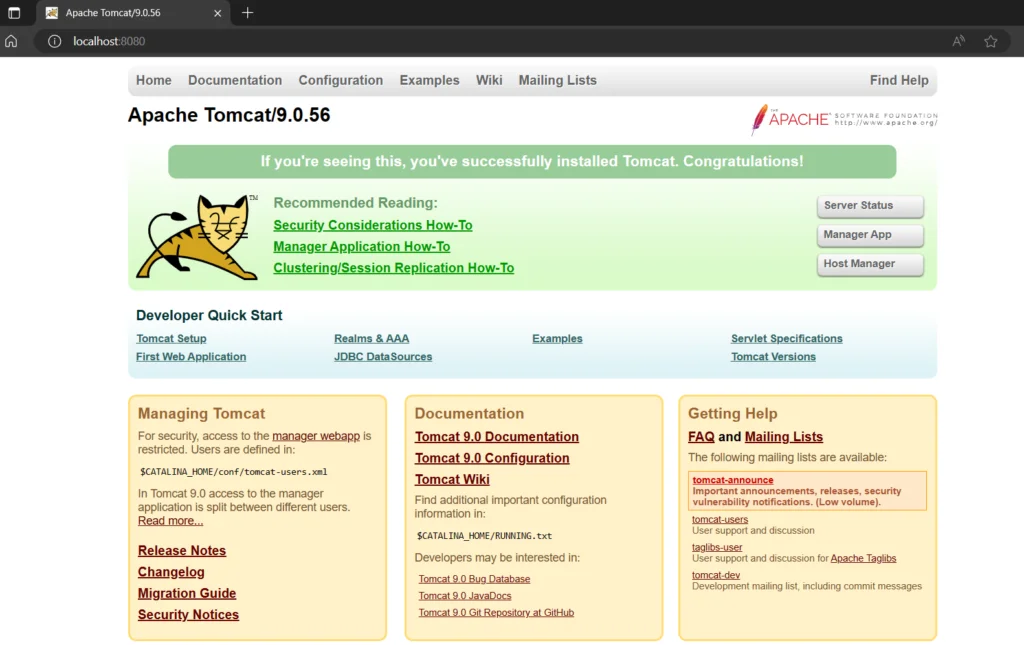
- Go to your browser and verify your installation by typing: localhost:8080
Step 5: Create a Dynamic Web Project
- Create New Project:
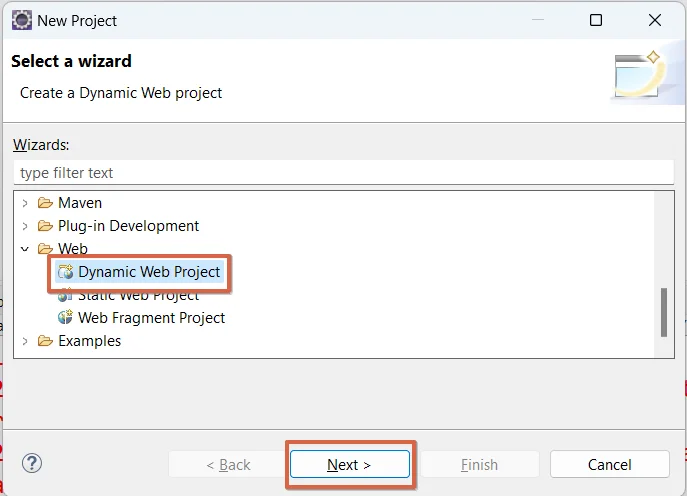
- Go to
File>New>Project>Web. - Select
Web>Dynamic Web Projectand clickNext.
- Go to
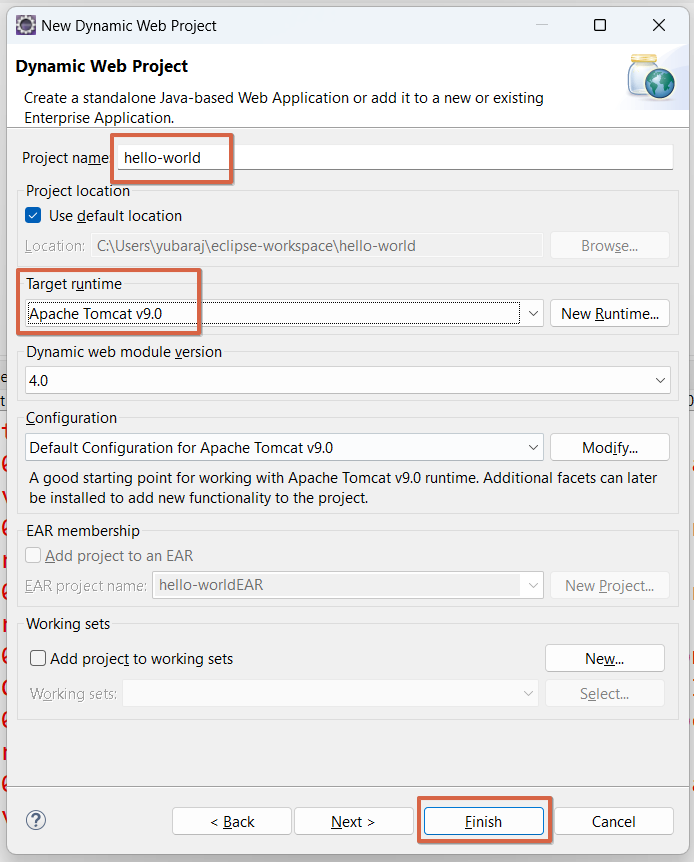
- Configure Project:
- Enter the project name (e.g.,
hello-world). - Set the
Target runtimetoApache Tomcat v9.0. - Click
Finish.
- Enter the project name (e.g.,
Step 6: Run Project in Eclipse
To run project in eclipse, right click on the project and click on Run As > Run on Server and select Server then click Finish.
Step 7: Troubleshooting Tips
- Port Issues: If Tomcat does not start, it might be due to port conflicts. Edit
server.xmlin theconfdirectory of your Tomcat installation to change the port from 8080 to another port. - Eclipse Console Errors: Check the Eclipse console for any deployment errors or exceptions.
- Tomcat Logs: Check the Tomcat logs located in the
logsdirectory for more detailed error messages.
By following these steps, you should have a fully functional setup of Eclipse with Tomcat for Java web development.