In this post, we will learn to create a Spring Boot project using Spring Initializer. Spring initializer is a simple web page that helps us to generate a spring boot project along with the required structure.
Create Spring Boot Project
Let’s follow the steps given below to create a spring boot project.
- Go to https://start.spring.io/ and you will see a page like the one below.
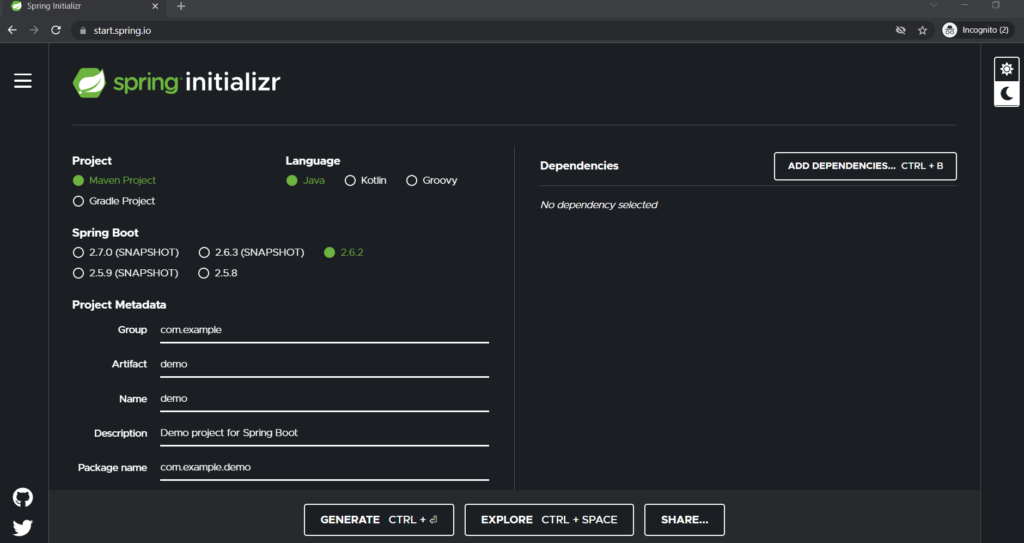
- You can select a project type whether a Maven or Grade. Here, we will be selecting a Maven project.
- You can select a language. The default will be Java
- You can select a specific version. It is not recommended to select a SHAPSHOT version. We will be selecting 2.6.2 here.
- Group Id:
com.codersathi - Artifact Id: hello-world
- Name: hello-world
- Description: You can give whatever you like. We will be leaving it as default.
- Package name: It will be generated automatically based on the Artifact and Group ID
- Packaging: You can choose either Jar or War
- Java Version: We will be choosing 11
- On the right side click Add Dependencies button.
- We will be adding web dependency here. You can add other dependencies as per your need.
- After adding Web dependency, click on the Generate button.
- After clicking the Generate button, it will generate a Zip file in your download location. Unzip it.
Open Spring Boot Project in Eclipse
Now, we have created a Spring Boot project. The project is generated and unzipped. Now, it’s time to open your Eclipse and follow the instructions to open a recently generated project there.
- Open your Eclipse IDE.
- Go to the File menu and click on Import…
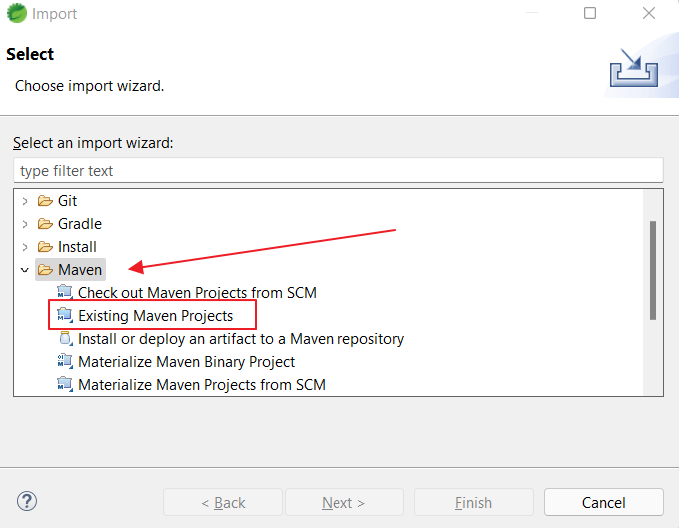
- In the Import dialog box, select Maven, expand it, and click on the Existing Maven Projects as shown in the image below.
- Click Next button and you will see a window like below.
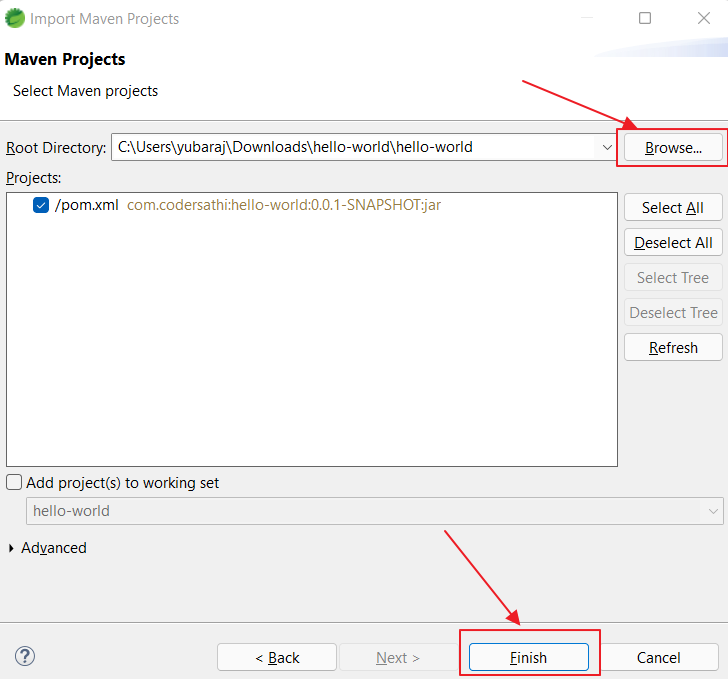
- Click Browse… button and select a project you have Unzipped earlier and click Finish button.
- Your project willbe imported into Eclipse and you may see your project like below
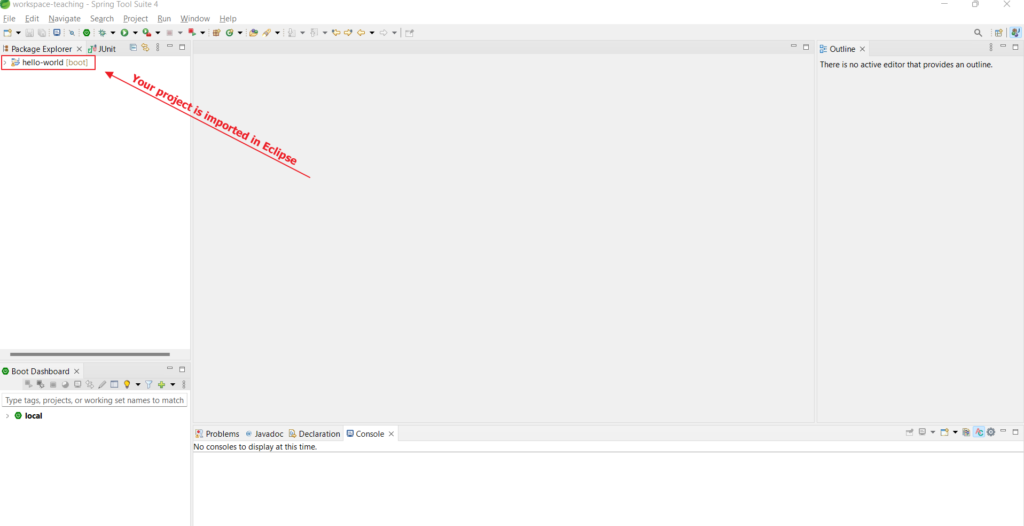
- Expand your project and you will see a similar kind of structor in your Eclipse. See the image below
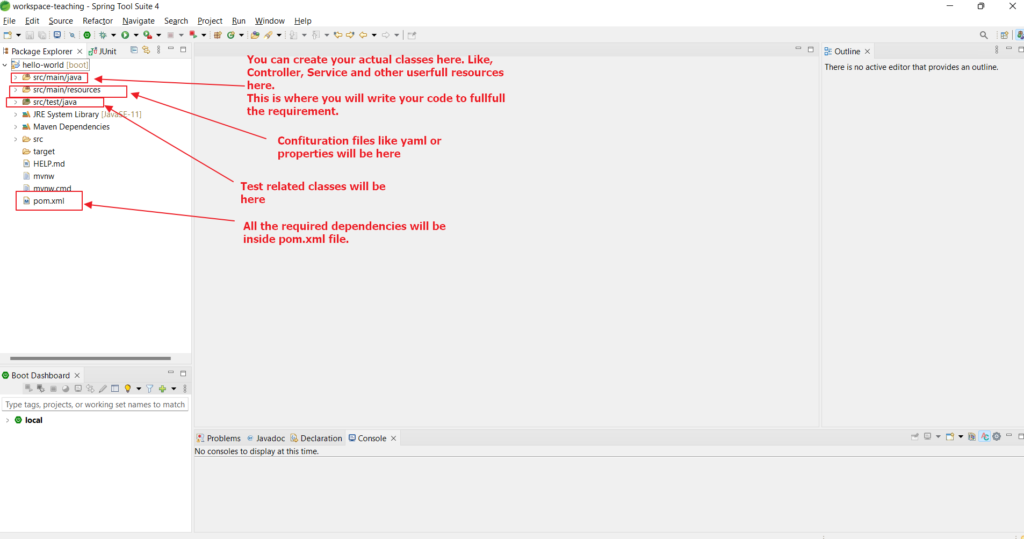
Congratulations! You have successfully generated a spring boot project and imported it into Eclipse.
Conclusion
We followed the steps given above to create a Spring Boot project using spring initializer and open it in eclipse IDE.