To add an external jar in Eclipse we can follow the steps given below:
There are a few ways to add the MySQL Connector JAR to an Eclipse Java project, The easiest one of the most common is:
- Download the MySQL Connector JAR from the official website.
- Go to Eclipse, and open the project where you want to add the JAR.
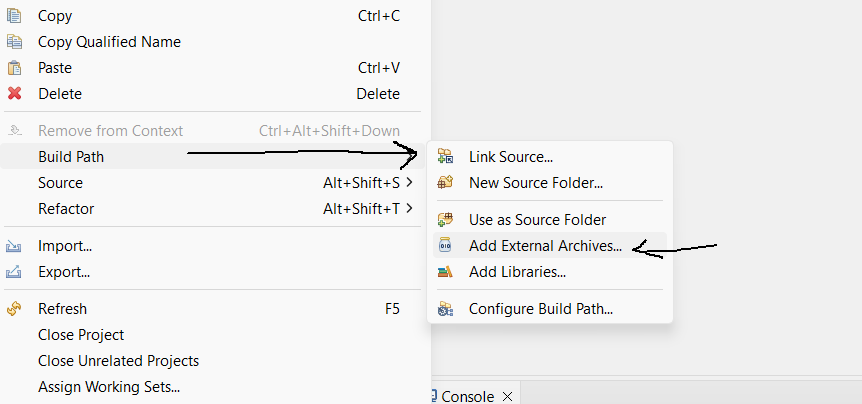
- Right-click on the project in the Project Explorer and select Build Path -> Add External Archives...

- Navigate to the location where you have downloaded the MySQL Connector JAR and select it.
- Click on the Apply and Close button to add the JAR to the project’s classpath.
Alternatively, you can add the jar file to the build path of your project by following these steps:
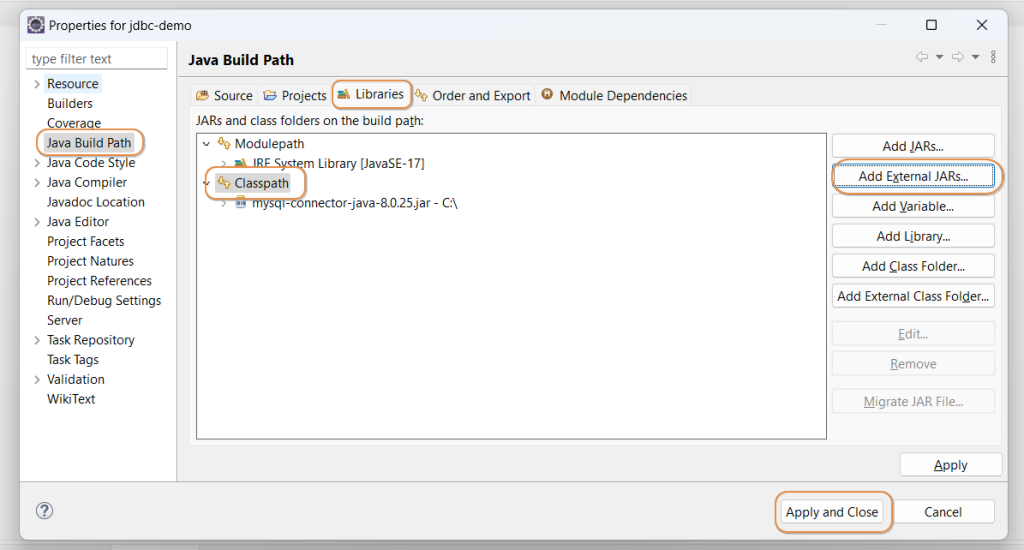
- Right-click on the project in the Project Explorer and select Properties.
- Select Java Build Path on the left side.
- Select the Libraries tab, Classpath, and then click on the Add External JARs button.

- Navigate to the location where you have downloaded the MySQL Connector JAR and select it.
- Click on the Apply and Close button to add the JAR to the project’s classpath.
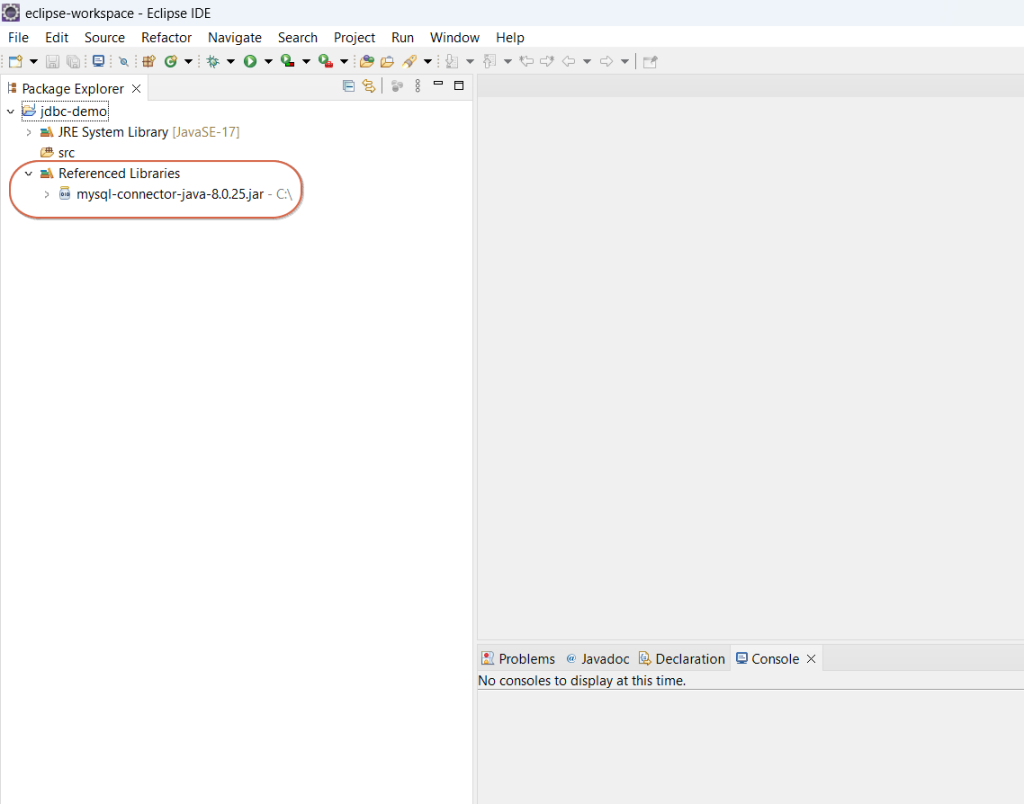
You should now be able to use the MySQL Connector classes in your project. You can verify that the jar is added to the build path by checking whether it’s listed in the Referenced Libraries folder in the project explorer. It should display an external jar as shown in the image below:

After following the steps given above you should be able to add an external JAR in the Eclipse project.