
User attention spans are shrinking, and weak passwords remain a massive security risk. For modern web applications, forcing users to remember complex passwords is an outdated hurdle. The solution? Passwordless login via one-time links. Hence, in this post we will learn how to implement passwordless authentication in spring boot.
With the release of Spring Security 6.4+ (included in Spring Boot 3.4.0+), implementing a secure, production-grade passwordless architecture is easier than ever. This guide provides a complete, workable, step-by-step example to get a One-Time Token (OTT) login system running in minutes.
Table of Contents
What is Passwordless OTT Authentication?
Instead of providing a password, a user submits their email address. The backend generates a secure, short-lived, single-use token, embeds it into a unique URL (a one time use link), and emails it to the user. Clicking that link instantly verifies their identity and logs them into your application.
Step 1: Project Setup and Dependencies
Initialize a new Spring Boot project. Ensure your build file targets Java 17+ and Spring Boot 3.4.0 or newer.
Add the web and security starters to your pom.xml:
<?xml version="1.0" encoding="UTF-8"?>
<project xmlns="http://maven.apache.org/POM/4.0.0" xmlns:xsi="http://www.w3.org/2001/XMLSchema-instance"
         xsi:schemaLocation="http://maven.apache.org/POM/4.0.0 https://maven.apache.org/xsd/maven-4.0.0.xsd">
    <modelVersion>4.0.0</modelVersion>
    <parent>
        <groupId>org.springframework.boot</groupId>
        <artifactId>spring-boot-starter-parent</artifactId>
        <version>4.1.0</version>
        <relativePath/> <!-- lookup parent from repository -->
    </parent>
    <groupId>com.codersathi</groupId>
    <artifactId>spring-passwordless-login</artifactId>
    <version>0.0.1-SNAPSHOT</version>
    <name>spring-passwordless-login</name>
    <description>spring-passwordless-login</description>
    <url/>
    <licenses>
        <license/>
    </licenses>
    <developers>
        <developer/>
    </developers>
    <scm>
        <connection/>
        <developerConnection/>
        <tag/>
        <url/>
    </scm>
    <properties>
        <java.version>17</java.version>
    </properties>
    <dependencies>
        <dependency>
            <groupId>org.springframework.boot</groupId>
            <artifactId>spring-boot-starter-security</artifactId>
        </dependency>
        <dependency>
            <groupId>org.springframework.boot</groupId>
            <artifactId>spring-boot-starter-webmvc</artifactId>
        </dependency>
        <dependency>
            <groupId>org.springframework.boot</groupId>
            <artifactId>spring-boot-starter-security-test</artifactId>
            <scope>test</scope>
        </dependency>
        <dependency>
            <groupId>org.springframework.boot</groupId>
            <artifactId>spring-boot-starter-webmvc-test</artifactId>
            <scope>test</scope>
        </dependency>
    </dependencies>

    <build>
        <plugins>
            <plugin>
                <groupId>org.springframework.boot</groupId>
                <artifactId>spring-boot-maven-plugin</artifactId>
            </plugin>
        </plugins>
    </build>

</project>
Step 2: Handle Token Delivery (Success Handler)
Once Spring Security automatically generates a one-time token, your application must decide how to deliver it. By creating a custom OneTimeTokenGenerationSuccessHandler, you can build the one time login link and print or dispatch it.
Create a file named PasswordlessLinkGenerationSuccessHandler.java:
package com.codersathi.springpasswordlesslogin;

import jakarta.servlet.ServletException;
import jakarta.servlet.http.HttpServletRequest;
import jakarta.servlet.http.HttpServletResponse;
import org.springframework.security.authentication.ott.OneTimeToken;
import org.springframework.security.web.authentication.ott.OneTimeTokenGenerationSuccessHandler;
import org.springframework.security.web.authentication.ott.RedirectOneTimeTokenGenerationSuccessHandler;
import org.springframework.security.web.util.UrlUtils;
import org.springframework.web.util.UriComponentsBuilder;

import java.io.IOException;

public class PasswordlessLinkGenerationSuccessHandler implements
		OneTimeTokenGenerationSuccessHandler {

	// Built-in strategy to redirect the user to a "Check your email" info page after submission
	private final OneTimeTokenGenerationSuccessHandler defaultRedirectHandler =
			new RedirectOneTimeTokenGenerationSuccessHandler("/login/ott");

	@Override
	public void handle(HttpServletRequest request, HttpServletResponse response,
			OneTimeToken oneTimeToken) throws IOException, ServletException {

		// 1. Build the absolute verification URL using Spring Security's default OTT endpoint
		String link = UriComponentsBuilder.fromUriString(UrlUtils.buildFullRequestUrl(request))
				.replacePath(request.getContextPath()+"/login/ott")
				.queryParam("token", oneTimeToken.getTokenValue())
				.build()
				.encode()
				.toUriString();

		// 2. Extract recipient details
		String userEmail = oneTimeToken.getUsername();

		// 3. Dispatch the token (We print to console here; replace this with JavaMailSender in production)
		sendLinkEmail(userEmail, link);

		// 4. Trigger the UI redirect so the user knows a token has been dispatched
		this.defaultRedirectHandler.handle(request, response, oneTimeToken);
	}

// You can implement to send email
	private void sendLinkEmail(String email, String link) {
		System.out.println("==========================================================");
		System.out.println("SECURITY ALERT: DISPATCHING LOGIN LINK");
		System.out.println("To: " + email);
		System.out.println("Link: " + link);
		System.out.println("==========================================================");
	}
}
In the above code, I have printed a link in the console instead of sending email. You can write a code to send email. If you don’t know how to implement it, you can check out our post to send email using Java.
Step 3: Configure the Spring Security Filter Chain
Next, plug your token generation handler into the security pipeline using the .oneTimeTokenLogin() configuration block.
Create a file named SecurityConfig.java:
package com.codersathi.springpasswordlesslogin;

import org.springframework.context.annotation.Bean;
import org.springframework.context.annotation.Configuration;
import org.springframework.security.config.annotation.web.builders.HttpSecurity;
import org.springframework.security.config.annotation.web.configuration.EnableWebSecurity;
import org.springframework.security.core.userdetails.User;
import org.springframework.security.core.userdetails.UserDetails;
import org.springframework.security.core.userdetails.UserDetailsService;
import org.springframework.security.provisioning.InMemoryUserDetailsManager;
import org.springframework.security.web.SecurityFilterChain;

@Configuration
@EnableWebSecurity
public class SecurityConfig {
	@Bean
	public SecurityFilterChain securityFilterChain(HttpSecurity http) throws Exception {
		http

				.authorizeHttpRequests(auth ->
						auth
								.requestMatchers("/ott/generate", "/login/ott").permitAll()
						.anyRequest().authenticated()
				)
				// Enable default form login UI to easily access the OTT request screen
				.formLogin(form -> form.permitAll())
				// Activate One-Time Token capabilities
				.oneTimeTokenLogin(ott -> ott
						.tokenGenerationSuccessHandler(new PasswordlessLinkGenerationSuccessHandler())
				);

		return http.build();
	}

	@Bean
	public UserDetailsService userDetailsService() {
		// Set up a mock user. Passwords are ignored during passwordless login validation.
		UserDetails user = User.withUsername("[email protected]")
				.password("{noop}ignored-password")
				.roles("USER")
				.build();
		return new InMemoryUserDetailsManager(user);
	}
}
Step 4: Create a Protected Landing Endpoint
To verify that your authentication mechanism successfully locks down resources and establishes a secure session, add a basic REST endpoint.
Create a file named HomeController.java:
package com.codersathi.springpasswordlesslogin;

import org.springframework.security.core.annotation.AuthenticationPrincipal;
import org.springframework.security.core.userdetails.UserDetails;
import org.springframework.web.bind.annotation.GetMapping;
import org.springframework.web.bind.annotation.RestController;

@RestController
public class UIController {

	@GetMapping("/")
	public String welcomeSecureUser(@AuthenticationPrincipal UserDetails userDetails) {
		return "✨ Access Granted! Welcome to your secure dashboard, " + userDetails.getUsername() + "!";
	}
}
Step 5: Testing Your Passwordless Implementation
- Start your Spring Boot application using your IDE or terminal:
./mvnw spring-boot:run. - Open an incognito browser window and navigate to
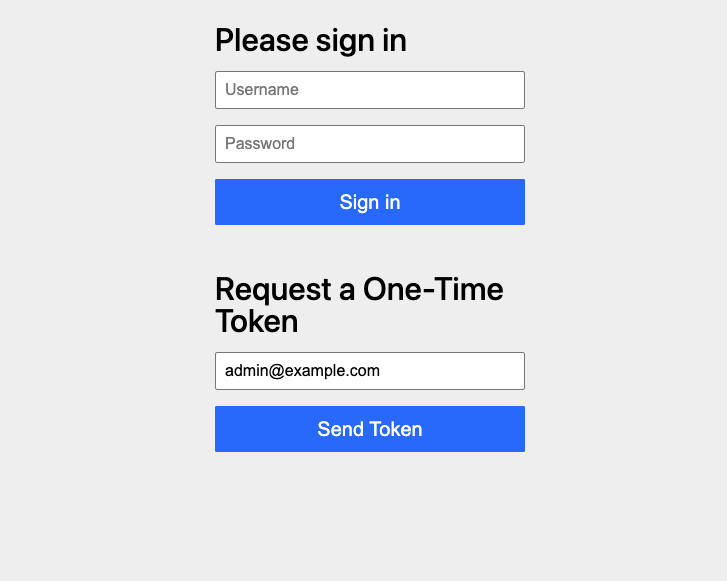
http://localhost:8080/. - Spring Security redirects you to the default login screen. Under the primary login form, click the link labeled “Submit One-Time Token Request” (pointing to
/ott/generate). - Type
[email protected]into the input field and hit submit.
- Check your IDE application terminal logs. You will see your custom security console block print the absolute verification link:
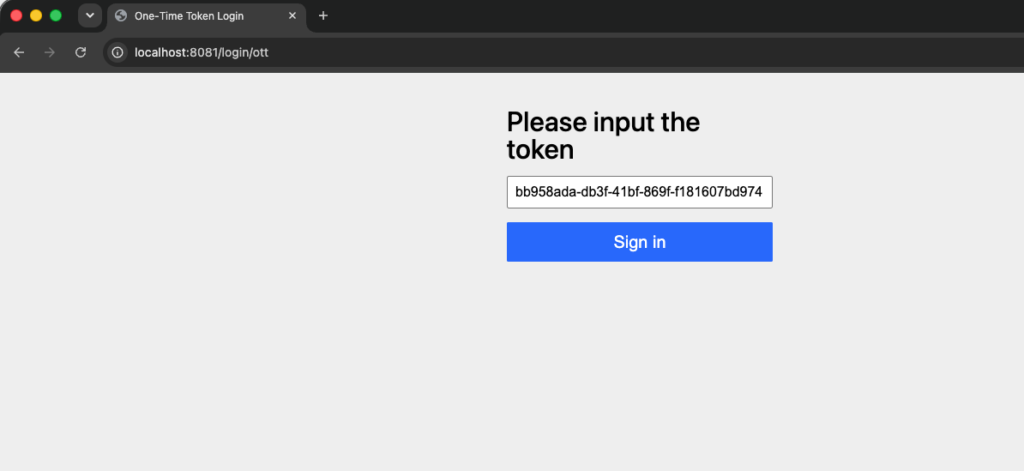
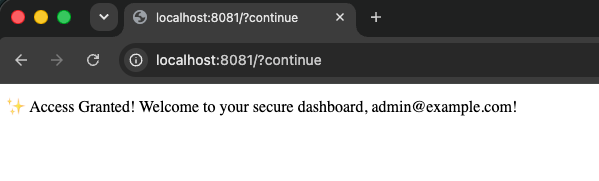
http://localhost:8081/login/ott?token=d81ee548-2928-4794-9eed-62fd9825b181 - Either copy that complete URL, paste it into your browser address bar, and click Sign in button or just paste the token value from the url printed in the console on the following screen and click Sign in button. It will be redirected to success page:
- Success! The system validates the single-use token, initializes a security session context, and securely displays your home controller landing message.
Things to remember
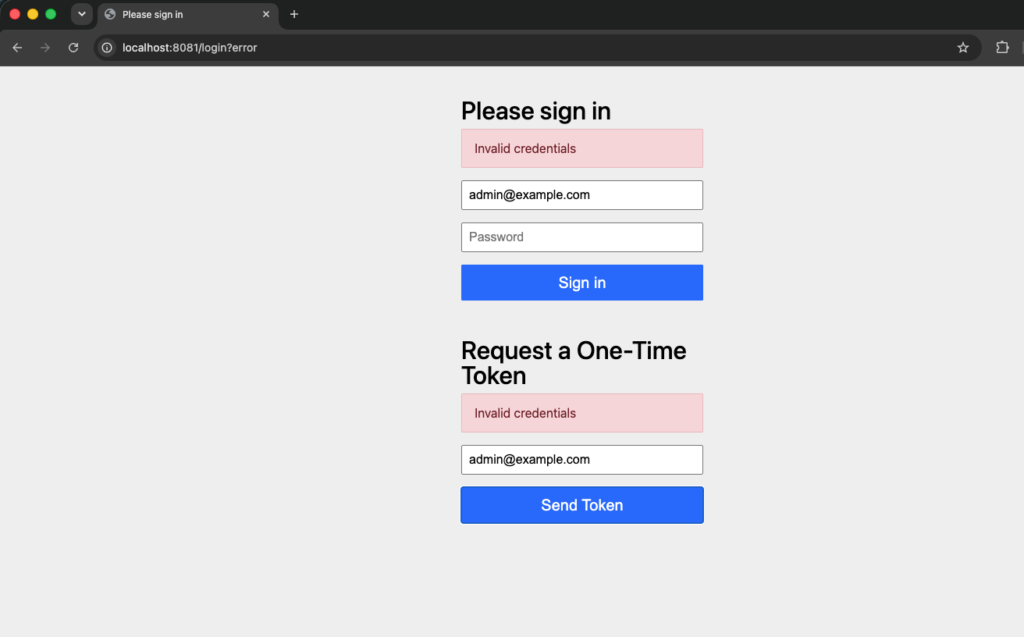
This link works only one time. If you try to use the same link more than one time it does not work. It will display invalid credentials like the below: